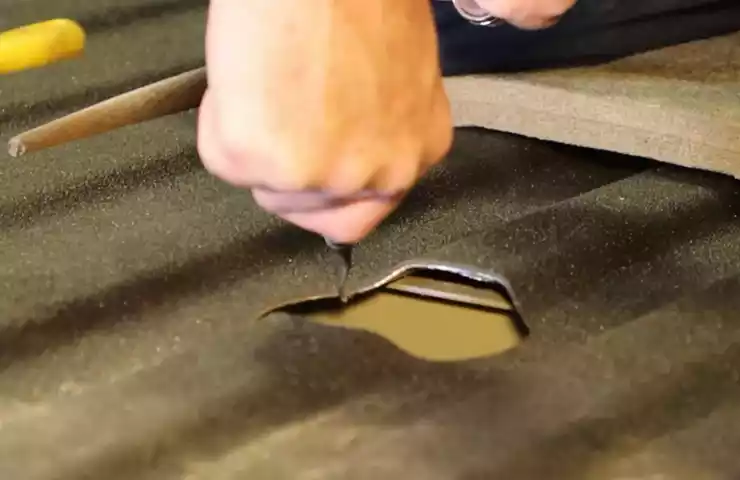
To install a B&W Gooseneck Hitch, start by locating the mounting location on your truck bed and marking it with a pencil or marker. Then, use a drill to create holes for the installation bolts.
Once the holes are drilled, position the hitch over the mounting location and secure it using the provided bolts and nuts. Finally, tighten all the hardware to ensure a secure installation. Are you planning to tow heavy loads with your truck?
Installing a B&W Gooseneck Hitch can greatly enhance your towing capabilities. This type of hitch is specifically designed for heavy-duty towing, providing a secure and reliable connection between your truck and trailer. In this guide, we will walk you through the step-by-step process of installing a B&W Gooseneck Hitch, allowing you to confidently tackle any towing task that comes your way. So let’s get started and ensure that your hitch is properly installed for maximum towing performance.
The Basics Of A B&W Gooseneck Hitch
If you are a truck owner, you know how important it is to have the right towing equipment to make your hauling tasks easier and more efficient. One type of towing hitch that has gained popularity among truck owners is the gooseneck hitch. Specifically, the B&W Gooseneck Hitch is known for its durability and performance. In this blog post, we will dive into the basics of a B&W Gooseneck Hitch, including its purpose, benefits, and key components. So, let’s get started!
Understanding the purpose and benefits of a gooseneck hitch
A gooseneck hitch is designed to provide superior towing capabilities, specifically for heavy-duty trailers and equipment. Unlike traditional bumper-mounted hitches, a gooseneck hitch mounts inside the truck bed, directly over the rear axle. This placement offers several benefits:
- Increased stability: The gooseneck design places the trailer’s weight over the rear axle, enhancing stability and minimizing the chances of the truck and trailer swaying.
- Better weight distribution: By distributing the weight of the trailer more evenly between the front and rear axles of the truck, a gooseneck hitch helps maintain stability and control, especially when towing heavy loads.
- Improved maneuverability: With a gooseneck hitch, the truck and trailer have a tighter turning radius compared to other hitch types. This is particularly advantageous when navigating tight corners or parking in limited spaces.
These benefits make the gooseneck hitch a popular choice for individuals who frequently tow heavy loads, whether it’s for work or recreational purposes.
Explaining the components and features of a B&W Gooseneck Hitch
When it comes to gooseneck hitches, the B&W Gooseneck Hitch is a reliable and trusted name in the industry. Let’s take a closer look at the key components and features of the B&W Gooseneck Hitch:
| Component | Description |
|---|---|
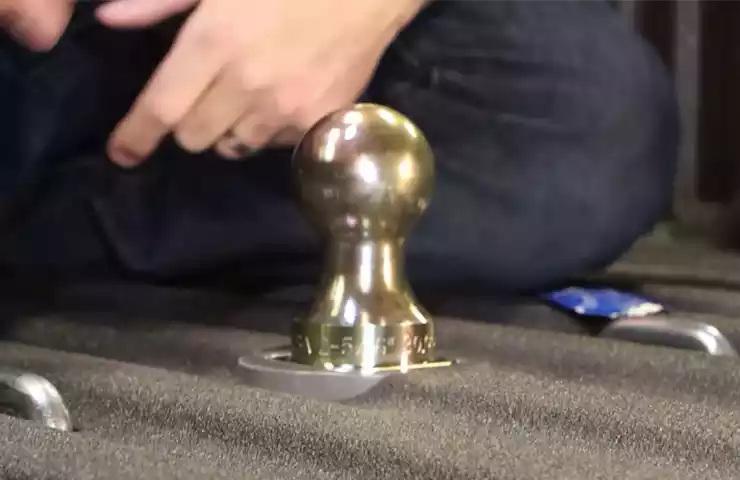
| Gooseneck Ball | The gooseneck ball is the main connection point between the truck and trailer. It attaches to the hitch mechanism beneath the truck bed and provides a secure connection for towing. |
| Hitch Mechanism | The hitch mechanism is the system that allows the gooseneck ball to be securely mounted and locked into place. B&W Gooseneck Hitches typically feature a cam-action latching mechanism, ensuring a strong and reliable connection. |
| In-Bed Rails | B&W Gooseneck Hitches utilize in-bed rails, which are permanently installed on the truck bed. These rails serve as the support system for the gooseneck hitch and provide a secure mounting point. |
| Spring-Loaded Safety Chain Hooks | For added safety, the B&W Gooseneck Hitch includes spring-loaded safety chain hooks. These hooks provide a reliable attachment point for safety chains, ensuring that the trailer stays connected to the truck even in the event of a hitch failure. |
These components and features make the B&W Gooseneck Hitch a top choice for truck owners looking for a sturdy and efficient towing solution. Whether you’re towing equipment for your construction business or hauling your RV for a weekend getaway, a B&W Gooseneck Hitch provides the reliability and performance you need.
Now that we’ve covered the basics of a B&W Gooseneck Hitch, you have a better understanding of its purpose, benefits, and key components. Stay tuned for our next blog post, where we will walk you through the installation process step by step, so you can confidently install a B&W Gooseneck Hitch on your truck.
Tools And Materials Needed
List of Tools Required for Installation
When it comes to installing a B&W Gooseneck Hitch, having the right tools is essential to ensure a successful and efficient installation process. Here is a comprehensive list of the tools you will need to have on hand before starting the installation:
| Tool | Quantity |
|---|---|
| Torque Wrench | 1 |
| Socket Set | 1 |
| Wrench Set | 1 |
| Jack | 1 |
| Jack Stands | 2 |
| Drill | 1 |
| Drill Bits | Assorted Sizes |
| Measuring Tape | 1 |
| Marker | 1 |
| Level | 1 |
| Grease | 1 Tub |
| Safety Glasses | 1 Pair |
Outline of Materials for a Successful Installation

Apart from the essential tools, you will also need specific materials to ensure a successful installation of your B&W Gooseneck Hitch. These materials will help provide a solid and secure attachment point for your gooseneck trailer. Here are the necessary materials:
- Gooseneck Hitch Kit
- Mounting Rails
- Mounting Brackets
- Bolts and Hardware
- Electrical Tape
- Wire Cutters
- Electrical Connectors
- Wire Strippers
- Zip Ties
By ensuring you have all the required tools and materials before starting the installation process, you can save time and complete the job efficiently. This comprehensive list will help you gather everything needed, making the installation of your B&W Gooseneck Hitch a breeze.
Pre-Installation Preparations
Before installing a B&W Gooseneck Hitch, there are a few crucial preparatory steps to ensure a successful installation. Paying attention to these pre-installation preparations will save you both time and frustration in the long run. Let’s dive into the key factors to consider when getting ready to install your gooseneck hitch.
Choosing the right location for the hitch
When installing a B&W Gooseneck Hitch, one of the first things to consider is where to place it on your vehicle. The gooseneck hitch is typically mounted in the truck bed, and the location should be carefully chosen to maximize functionality and convenience. Here are a few points to keep in mind:
- Ensure the hitch is easily accessible, allowing for easy attachment and removal of trailers.
- Secure the hitch in an area that does not interfere with any existing components or electrical systems.
- Consider the overall weight distribution of your vehicle and place the hitch in a position that helps maintain balance when towing.
By choosing the right location for your gooseneck hitch, you can ensure a smooth towing experience while also preventing any potential damage to your vehicle.
Considering the weight capacity and compatibility with your vehicle
Before proceeding with the installation, it is crucial to consider the weight capacity and compatibility of the gooseneck hitch with your specific vehicle. This involves understanding the towing capacity of your vehicle and selecting a hitch that can handle the load you intend to tow.
Consult your vehicle’s manufacturer guidelines or owner’s manual to determine the maximum weight your vehicle can safely tow. Additionally, consider the Gross Vehicle Weight Rating (GVWR) to ensure that the gooseneck hitch you choose is compatible with your vehicle’s weight capacity.
Understanding any potential modifications needed
It is essential to understand that installing a gooseneck hitch may require certain modifications to your vehicle. These modifications may include drilling holes in the truck bed, reinforcing the frame, or making alterations to the exhaust system.
Prior to installation, thoroughly read the installation instructions provided by the manufacturer to identify any modifications that may be necessary for your specific vehicle. It is advisable to consult a professional mechanic or experienced installer to ensure the modifications are done correctly and safely.
By understanding and addressing any potential modifications, you can avoid complications during the installation process and ensure the gooseneck hitch is securely and reliably installed.
Step-By-Step Installation Guide
Installing a B&W Gooseneck Hitch is a relatively straightforward process that requires careful attention to detail. By following this step-by-step installation guide, you can ensure a safe and secure hitch installation that will give you peace of mind while towing.
Ensuring Safety Precautions Before Starting the Installation
Prior to beginning the installation process, it is important to take certain safety precautions for a smooth and hazard-free experience. Here are a few key safety measures to keep in mind:
- Ensure that the vehicle is parked on a level surface and the parking brake is engaged.
- Wear appropriate safety gear, such as gloves and safety goggles, to protect yourself during the installation process.
- Read and thoroughly understand the instructions and warnings provided by the manufacturer before proceeding with the installation.
Step-by-Step Instructions for Mounting the Hitch to the Vehicle
The following step-by-step instructions outline the process of mounting the B&W Gooseneck Hitch to your vehicle:
- Step 1: Begin by ensuring that the truck bed is clean and free of any debris that may interfere with the installation process.
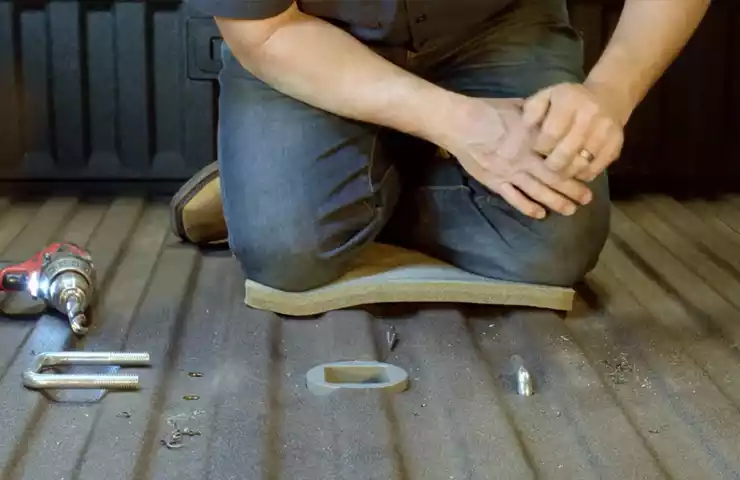
- Step 2: Position the hitch in the desired location within the truck bed, aligning it with the pre-existing holes or marks provided by the manufacturer.
- Step 3: Attach the mounting brackets to the hitch using the provided hardware. Securely tighten the bolts to ensure a firm connection.
- Step 4: Insert the installation rails into the truck bed, aligning them with the mounting brackets on the hitch.
- Step 5: Secure the installation rails to the truck bed using the appropriate hardware, ensuring a tight fit that minimizes movement or play.
- Step 6: Double-check all the connections and bolts to ensure they are tightened properly, providing a strong and secure foundation for the hitch.
Connecting the Hitch to the Trailer and Securing It in Place
The final step in the installation process involves connecting the B&W Gooseneck Hitch to the trailer and ensuring its secure attachment. Follow these steps:
- Step 1: Back the trailer into position, ensuring that the trailer coupler aligns with the hitch ball.
- Step 2: Lower the coupler onto the hitch ball, ensuring that it is securely seated.
- Step 3: Lock the coupler in place, using the appropriate mechanism provided by the manufacturer.
- Step 4: Connect the safety chains from the trailer to the designated points on the hitch, ensuring they are fastened securely.
- Step 5: Test the hitch and trailer connection by gently applying pressure to ensure stability and proper attachment.
By following these step-by-step instructions, you can confidently install a B&W Gooseneck Hitch, guaranteeing a safe and secure towing experience. Always refer to the manufacturer’s specific instructions for your particular hitch model, as the installation steps may vary slightly.
Wiring And Electrical Connections
When installing a B&W Gooseneck Hitch, properly wiring and making electrical connections is crucial to ensure safe and efficient trailer operation. In this section, we will walk you through how to install the wiring harness for proper trailer lighting, connect the breakaway switch, and attach the safety chains.
1. Installing the wiring harness for proper trailer lighting
To properly install the wiring harness for your B&W Gooseneck Hitch, follow these steps:
- Start by locating the wiring harness provided with your hitch kit. It should include a connector with the necessary wires.
- Locate the electrical connection points in your vehicle’s wiring system. This is typically located near the rear bumper.
- Begin by connecting the ground wire from the hitch harness to the trailer’s grounding point. Proper grounding ensures the flow of electricity and prevents any potential electrical issues.
- Connect the remaining wires from the harness to their corresponding wires on your vehicle’s wiring system. These connections are typically color-coded for easier identification.
- After making all the necessary connections, use zip ties or electrical tape to secure the wiring harness and prevent it from hanging loose. This will help protect the wires from damage and ensure they stay in place during towing.
- Once the wiring harness is securely installed, test the trailer lighting to ensure everything is functioning properly. Check the headlights, brake lights, turn signals, and running lights to ensure they are all working as intended.
2. Connecting the breakaway switch and safety chains
Properly connecting the breakaway switch and safety chains is vital to the overall safety of your trailer. Here’s how to do it:
- Attach the breakaway switch to a secure and accessible location on your trailer frame. This switch is designed to apply the trailer brakes in case it becomes disconnected from the tow vehicle.
- Connect the breakaway switch’s wiring to your trailer’s wiring harness. Ensure the connection is secure to prevent any disruptions in the breakaway system’s functionality.
- Attach the safety chains to the designated anchor points on both your trailer and tow vehicle. The chains act as a backup in case the hitch coupler and ball connection fails while towing.
- Ensure the safety chains are properly tightened and have enough slack to allow for turns and maneuvering without being overly loose.
- Double-check all the connections and ensure they are secure before towing your trailer. This will help prevent accidents and provide a peace of mind during your journey.
By following these steps and paying attention to detail, you can ensure the proper installation of wiring and electrical connections for your B&W Gooseneck Hitch. This will contribute to safer and more efficient towing experiences while also keeping you in compliance with applicable regulations.
Testing And Adjustment
Verifying the hitch’s stability and functionality is crucial to ensure a safe and successful towing experience. Once you have successfully installed the B&W Gooseneck Hitch, the next step is to test and adjust it for optimal performance. This process involves checking the hitch’s stability, making necessary adjustments, and setting the correct hitch height to provide a smooth and secure towing experience.
Verifying the hitch’s stability and functionality
- First and foremost, check for any signs of damage or loose parts. Inspect the hitch to ensure all bolts and components are tightly secured. Any loose connections can lead to instability during towing.
- With the gooseneck hitch properly installed, carefully attach the trailer to the hitch ball. Make sure it is securely latched and locked in place.
- Once the trailer is attached, test the stability by gently pushing and pulling on the trailer in different directions. Observe if there are any excessive movements or noises that might indicate a problem.
- While the trailer is attached, visually inspect the hitch to ensure it maintains its position and structure. Look for any signs of movement or shifting that might require adjustments.
- If the hitch passes the stability test, it’s time to evaluate its functionality. Raise and lower the trailer jack to verify if the hitch can handle the weight and smoothly engage and disengage the trailer.
- To further assess functionality, take your vehicle for a short test drive with the trailer attached. Pay attention to how the hitch performs during turns, acceleration, and braking.
- If you notice any issues during the stability or functionality tests, consult the manufacturer’s instructions or seek professional assistance to address the problem.
Adjusting the hitch height for optimal towing performance
Setting the correct hitch height is essential for optimal towing performance. Improper hitch height can lead to a lopsided trailer, poor weight distribution, or ineffective braking. Follow these steps to ensure the ideal hitch height:
- Begin by parking your vehicle and trailer on a level surface.
- Measure the height from the ground to the inside top edge of your vehicle’s hitch receiver.
- Measure the coupler height on your trailer, which is the distance from the ground to the bottom of the coupler.
- Compare the two measurements. The goal is to have the trailer coupler slightly higher than the vehicle’s hitch receiver, ensuring the trailer is level when hitched.
- If the trailer coupler is too low, lowering the hitch ball mount can raise the trailer’s front end. Conversely, if the coupler is too high, raising the hitch ball mount can level the trailer.
- Make small adjustments to the hitch ball mount’s height, following the manufacturer’s instructions for your specific gooseneck hitch system.
- After each adjustment, re-measure the heights and assess the trailer’s levelness. Continue making adjustments until the hitch height is optimal for your towing needs.
Testing and adjusting your B&W Gooseneck Hitch is an essential part of the installation process. Taking the time to ensure the hitch’s stability and functionality, as well as setting the correct hitch height, will contribute to a safer and more enjoyable towing experience.
Maintenance And Safety Tips
Regular maintenance practices are essential to prolong the life of your B&W gooseneck hitch. By following these maintenance tips and incorporating them into your routine, you can ensure the hitch operates smoothly for years to come.
Regular maintenance practices to prolong the life of the hitch
- Inspect for wear and tear: Regularly inspect your gooseneck hitch for any signs of wear and tear. Look for cracks, rust, or loose bolts. Make sure to check the safety chain loops, safety pins, and other components for any damage. If you notice any issues, address them promptly to prevent further damage.
- Lubricate moving parts: Proper lubrication ensures smooth operation of the hitch and reduces the chance of corrosion. Apply a lubricant to the moving parts, such as the ball mechanism and the locking pin, as recommended by the manufacturer. This will prevent rusting and allow for easier hitching and unhitching.
- Clean after each use: After each towing session, clean the hitch to remove any dirt, debris, or road grime. Use a brush or a cloth to remove the buildup around the ball and other parts of the hitch. Cleaning it regularly will prevent the accumulation of corrosion-causing substances and maintain proper functionality.
- Retorque bolts: Over time, the bolts that secure the gooseneck hitch in place may loosen. Regularly check and retorque the bolts according to the manufacturer’s specifications. This will ensure that the hitch remains securely attached to your vehicle.
- Replace worn components: If you notice any worn or damaged components during your inspections, replace them immediately. Using worn-out parts can compromise the integrity and safety of the hitch. Always use genuine B&W replacement parts to maintain the original quality of your hitch.
Safety tips for safe towing with a gooseneck hitch
When it comes to towing with a gooseneck hitch, safety should always be a top priority. Keep these safety tips in mind to ensure a safe and trouble-free towing experience.
- Double-check your connections: Before hitting the road, double-check that the gooseneck ball is securely in place and locked. Make sure the safety chains are properly connected and crossed underneath the trailer tongue, providing an additional layer of security in case of a hitch failure.
- Proper weight distribution: Ensure that the trailer is loaded properly and evenly distributed. Improper weight distribution can lead to instability while towing, putting you and others on the road at risk. Follow the manufacturer’s guidelines for the maximum weight capacity and always place heavier items towards the front of the trailer.
- Practice caution while maneuvering: Gooseneck hitches enhance maneuverability, but it’s important to exercise caution when driving, especially while making sharp turns. Be mindful of the trailer’s length and take wider turns to avoid contact with curbs, obstacles, or other vehicles.
- Be aware of payload limits: Every vehicle has a maximum payload capacity specified by the manufacturer. Make sure not to exceed this limit, as overloading can result in poor braking, decreased handling, and increased risk of accidents.
- Keep a safe distance: Maintain a safe following distance to allow for adequate stopping time. The heavier the load, the longer the stopping distance required. Always consider the weather and road conditions when determining a safe distance.
- Brake in a controlled manner: When towing with a gooseneck hitch, it’s crucial to brake in a controlled manner. Sudden or aggressive braking can lead to trailer sway or jackknifing. Gradually apply the brakes and be aware of the trailer’s behavior to anticipate and correct any swaying tendencies.
Remember, following proper maintenance and safety protocols will not only keep you safe on the road but also extend the life of your B&W gooseneck hitch.
Frequently Asked Questions For How To Install A B&W Gooseneck Hitch
How Long Does It Take To Install A B&W Gooseneck Hitch?
Installing a B&W gooseneck hitch typically takes around 2-4 hours. The process involves mounting the hitch to your truck bed, making necessary adjustments, and securing it in place for safe towing. Hiring an experienced professional can ensure a quicker and more efficient installation.
Can You Install A Gooseneck Hitch Yourself?
Yes, you can install a gooseneck hitch yourself. It’s a simple process that saves you money. Just ensure you have the necessary tools, follow the instructions carefully, and take safety precautions. Remember to double-check that your vehicle is compatible with a gooseneck hitch before starting.
How Do You Install A Gooseneck Trailer Hitch?
To install a gooseneck trailer hitch, follow these steps: 1. Start by assembling the hitch components according to the manufacturer’s instructions. 2. Locate the designated mounting points on your vehicle’s frame. 3. Position the hitch over these points and secure it using bolts and washers.
4. Make sure the hitch is aligned properly and tighten all the bolts. 5. Finally, attach the trailer to the hitch and ensure it is securely connected before towing.
What Size Hole For B&W Gooseneck Hitch?
The size of the hole for a B&W gooseneck hitch depends on the specific model and vehicle. It is recommended to refer to the manufacturer’s instructions or consult with a professional to ensure the correct size hole for your specific hitch.
Conclusion
Installing a B&W Gooseneck Hitch doesn’t have to be a daunting task. By following the step-by-step instructions outlined in this guide, you can successfully install the hitch on your own. Remember to thoroughly read the manufacturer’s instructions and gather all the necessary tools and materials before you begin.
With a little patience and attention to detail, you’ll have your gooseneck hitch installed and ready for towing in no time. Happy towing!