To install a bed extender, position it at the edge of the truck bed and secure it using the provided hardware. Here is a step-by-step guide on how to easily install a bed extender for your pickup truck.
Whether you need additional space for hauling long items or want to secure your cargo, a bed extender is a practical accessory for your pickup truck. Installing a bed extender is a straightforward process that requires minimal tools and time.
By following a few simple steps, you can have a bed extender installed and ready to use in no time. In this guide, we will walk you through the installation process, providing clear instructions along the way. So, let’s get started and learn how to install a bed extender on your truck.
Tools And Materials Needed For Installation
Before you begin installing your bed extender, it’s important to gather all the necessary tools and materials. Having everything on hand will make the installation process smoother and more efficient. In this section, we’ll outline the list of required tools as well as the necessary materials and components.
List of Required Tools
Here’s a breakdown of the tools you’ll need to complete the bed extender installation:
| Tool | Quantity |
|---|---|
| Socket wrench set | 1 |
| Adjustable wrench | 1 |
| Phillips screwdriver | 1 |
| Tape measure | 1 |
| Marker or pencil | 1 |
| Safety goggles | 1 |
Make sure you have these tools readily available before you start the installation process. They will help you complete the job effectively and ensure a secure attachment of the bed extender to your truck.
Necessary Materials and Components
In addition to the tools mentioned above, you’ll also need the following materials and components:
- A bed extender kit (specific to your truck model)
- Mounting brackets
- Bolts, nuts, and washers (included in the kit)
- Instruction manual
The bed extender kit should include all the necessary parts to complete the installation. Be sure to double-check that you have everything listed in the kit before you begin. If any components are missing or damaged, contact the manufacturer for replacements.
Having the necessary tools and materials ready beforehand will make the installation process go smoothly. Now that you have everything you need, it’s time to move on to the next step: preparing your truck for installation.
Removing Existing Truck Bed Components
Before you can install a bed extender on your truck, it is important to make sure that you remove any existing components in the truck bed. This will create a clean and flat surface for the bed extender installation. Follow these steps to remove any existing components and prepare your truck bed for the installation:
Steps to remove any existing components:
- Begin by removing any tailgate protectors or bed rail caps that are installed on your truck. These components are usually secured with screws or adhesive, so make sure to have the necessary tools to remove them.
- Next, detach any tie-down brackets or cargo management systems that may be in place. These components are typically secured with bolts or clamps, so use the appropriate tools to loosen and remove them.
- If your truck bed has a bed liner, it may need to be taken out before installing the bed extender. Bed liners can be secured with screws or adhesive, so carefully remove them to avoid damaging the truck bed surface.
- Finally, check for any other accessories or components that might be attached to the truck bed. This could include bed dividers, toolboxes, or any other aftermarket additions. Remove these components as needed to ensure a clean and clear surface for the bed extender installation.
How to clean the truck bed surface:

Once you have removed all the existing components, it is essential to clean the truck bed surface thoroughly. This will ensure proper adhesion and a secure installation of the bed extender. Follow these steps to clean the truck bed surface:
- Start by removing any loose dirt, debris, or loose paint from the truck bed. Use a brush or air blower to get rid of any residue that might impact the adhesion of the bed extender.
- Next, wash the truck bed with mild soap and water to remove any remaining dirt or grease. Be sure to rinse thoroughly to eliminate all soap residue.
- Once the truck bed is clean and dry, inspect the surface for any rough patches or imperfections. Sand down any uneven areas and remove any excess paint or coatings if necessary.
- After the surface is smooth and prepped, wipe it down with a clean microfiber cloth to remove any remaining dust or particles.
- Now your truck bed surface is ready for the bed extender installation. Ensure it is free of any dirt or debris before proceeding.
By following these steps to remove existing components and clean the truck bed surface, you will be well-prepared for the installation of your new bed extender. Remember to take your time and be thorough, as a clean and smooth surface will contribute to a secure and effective installation.
Measuring And Marking The Installation Points
Installing a bed extender can provide extra space and versatility for transporting larger items in your truck bed. However, before you can start the installation process, it is important to measure and mark the installation points accurately. This ensures that the bed extender will be securely mounted and properly aligned.
Taking accurate measurements for installation
The first step in preparing for the installation of a bed extender is to take accurate measurements of your truck bed. This ensures that the extender will be the right fit and properly aligned with your truck’s dimensions. To take accurate measurements, follow these steps:
- Start by measuring the width of your truck bed. Place the tape measure at the inside edge of the bed, and stretch it across to the opposite inside edge. Take note of this measurement, as it will determine the width of the bed extender you will need.
- Next, measure the length of your truck bed. Place the tape measure at the front edge of the bed, and extend it to the back edge. Again, take note of this measurement, as it will determine the length of the bed extender you will need.
- Finally, measure the height of the truck bed sidewalls. This measurement is important for determining the height of the mounting brackets or drilling points for the bed extender.
Marking the points for drilling or mounting
After taking accurate measurements of your truck bed, the next step is to mark the points where the bed extender will be mounted or drilled into. These points ensure that the extender is securely attached and properly aligned. Here’s how to mark the points:
- Using a marker or a piece of chalk, mark the exact spots where the mounting brackets or drilling points should be placed. These points should be level and evenly spaced along the side walls of the truck bed.
- Double-check the measurements and markings to ensure accuracy. Take your time with this step to avoid any mistakes that might affect the installation process.
By measuring and marking the installation points accurately, you can ensure that the bed extender will be securely mounted and properly aligned with your truck bed. This will provide you with the additional space and versatility you need for transporting larger items.
Attaching The Mounting Brackets
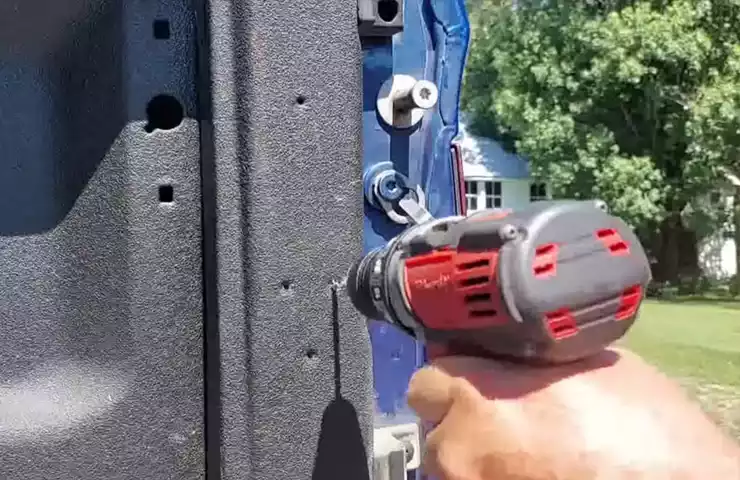
After unpacking your bed extender kit, the next step involves attaching the mounting brackets securely to your truck bed. The mounting brackets are an essential component that ensures the stability and functionality of your bed extender. Follow these steps to attach the mounting brackets properly:
Steps to attach the mounting brackets securely:
- Step 1: Gather the Materials
- Step 2: Prepare the Truck Bed
- Step 3: Measure and Mark
- Step 4: Attach the Brackets
- Step 5: Verify Alignment
By following these steps, you can easily attach the mounting brackets securely to your truck bed. Taking the time to ensure proper alignment and stable attachment will ensure that your bed extender functions effectively and safely, providing you with the added convenience and versatility you need.
Assembling The Bed Extender
Now that you have all the necessary tools and components ready, it’s time to start assembling your bed extender. Follow these simple steps to ensure a smooth and hassle-free installation process.
Putting together the bed extender components
The first step in assembling your bed extender is to identify and organize all the components included in the package. Take a moment to familiarize yourself with the various parts, such as the side panels, support brackets, and screws.
Next, lay out all the components on a clean and flat surface, making sure each piece is easily accessible. This will help you avoid any confusion or misplacement of parts during the assembly process.
Once you have everything laid out, refer to the instruction manual that came with your bed extender. This manual will outline the specific steps you need to follow for your particular brand and model. Make sure to read through the instructions thoroughly before proceeding.
Ensuring all parts are tightly connected
After familiarizing yourself with the components and instructions, it’s time to start connecting the different parts of your bed extender. Begin by attaching the side panels to the support brackets using the provided screws. Make sure to align the holes on the panels with those on the brackets before tightening the screws.
Once the side panels are secured, double-check to ensure they are firmly in place. Give each connection a gentle tug to confirm that the screws have been tightened adequately.
Continue the assembly process by attaching any additional components according to the instructions. This may include attaching a crossbar or securing a mesh screen. Again, refer to the manual for detailed guidance on these specific steps.
As you progress through the assembly, periodically check the tightness of each connection. This will help prevent any potential issues with stability or durability down the line.
Finally, once you have completed the assembly, take a moment to step back and admire your work. Ensure that the bed extender is securely attached to your truck bed or SUV cargo area.
By following these simple steps and ensuring each part is tightly connected, you can enjoy the benefits of a properly installed bed extender. Now it’s time to put your newly assembled bed extender to good use and make the most of your hauling capabilities!
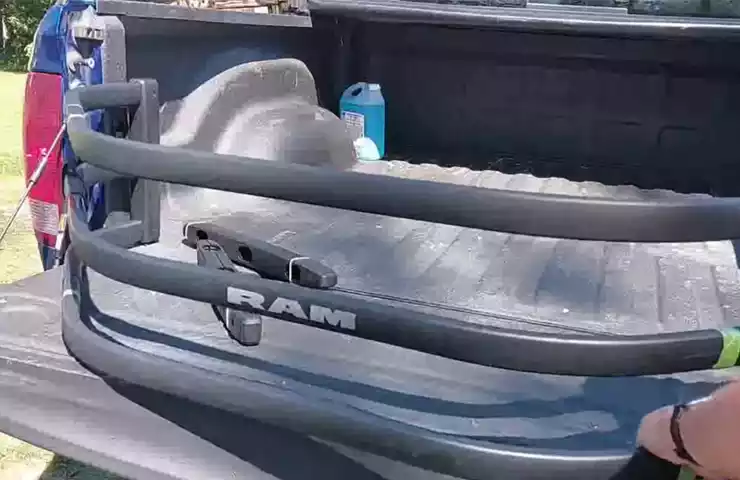
Securing The Bed Extender To The Truck Bed

Once you have successfully mounted the brackets onto your truck bed, the next step is securing the bed extender in place. This ensures that it remains stable during transportation and effectively extends the length of your truck bed. In this section, we’ll guide you through the process of mounting the bed extender onto the brackets and adjusting its position and tightness for maximum security.
Mounting the bed extender onto the brackets
To securely attach the bed extender to the brackets, follow these simple steps:
- Position the bed extender in line with the brackets, ensuring that it is properly aligned for a snug fit.
- Carefully slide the bed extender onto the brackets, taking note of any guide pins or grooves that may be present.
- Continue sliding the bed extender until it is firmly seated on the brackets, ensuring that it rests securely and evenly.
- Once the bed extender is in place, make sure to check for any movement or wobbling. Adjust as necessary to ensure a tight and secure fit.
Adjusting the position and tightness
After mounting the bed extender onto the brackets, it is important to adjust its position and tightness for optimal functionality and security. Here’s how to do it:
- Check if the bed extender is aligned straight with the truck bed. Make any necessary adjustments to ensure it is centered and parallel to the bed.
- Once aligned, tighten the bolts or screws that secure the bed extender to the brackets. Use a suitable wrench or tool to achieve the desired tightness.
- Test the stability of the bed extender by applying gentle pressure to various areas. The goal is to have a secure attachment with minimal movement.
- If there are any signs of wobbling or instability, recheck the alignment and tighten the bolts or screws further.
By properly securing the bed extender to your truck bed, you can ensure a safe and efficient transportation experience. Regularly inspect the bed extender and its attachments to identify any signs of loosening and promptly address them to maintain optimal performance.
Verifying Stability And Functionality
Once you have successfully installed your bed extender, it is crucial to verify its stability and functionality. This step is essential to ensure that the bed extender securely holds your cargo and functions properly, providing the convenience and ease you need.
Checking the stability of the bed extender
Ensuring the stability of the bed extender is vital for safe and secure transportation of your items. Below are some steps to check the stability:
- Inspect the attachment points: Carefully examine the points where the bed extender connects to your truck bed. Look for any loose bolts or weak connections. Tighten any loose bolts and ensure all connections are secure.
- Test for wobbling: Apply gentle pressure to the bed extender from different angles to check for any wobbling or movement. A stable and well-installed bed extender should not exhibit excessive wobbling.
- Examine weight capacity: Review the weight capacity of your specific bed extender model. Make sure the weight of your cargo does not exceed this limit to maintain stability during transport.
By following these steps, you can ensure that your bed extender is stable and ready to handle the weight of your cargo effectively.
Testing its functionality
After verifying the stability, it is crucial to test the functionality of your bed extender. Here are a few steps to ensure it functions properly:
- Extend and retract the bed extender: Utilize the extension feature of your bed extender to ensure it smoothly extends and retracts without any issues. Pay attention to any unusual sounds or resistance.
- Load and unload cargo: Place some light to moderate weight on the bed extender, simulating the process of loading and unloading. Make sure it can handle the weight and remains sturdy throughout the process.
- Operate the securing mechanisms: If your bed extender has additional securing mechanisms like straps or latches, test their functionality. Ensure they can effectively hold your cargo securely in place.
By testing the functionality of your bed extender, you can have peace of mind knowing that it will perform reliably when you need it the most.
Remember, regularly inspecting and testing the stability and functionality of your bed extender will help maintain its effectiveness and ensure a safe transportation experience. Incorporate these steps into your installation process, and you’ll have a reliable bed extender that will make hauling items a breeze!
Adjusting The Bed Extender For Desired Length
Installing a bed extender in your truck is a smart way to maximize space and secure your cargo. Once you have successfully installed the bed extender, the next step is to adjust it to the desired length. Having the bed extender at the right length is crucial to ensure a secure and snug fit in your truck bed. In this article, we will discuss the steps to adjust your bed extender for different bed lengths and achieve that perfect fit.
Making adjustments for different bed lengths
One of the great advantages of a bed extender is its versatility. It can be adjusted to accommodate different truck bed lengths, giving you the flexibility you need to transport cargo of varying sizes. To make these adjustments, follow these simple steps:
- Locate the adjustment points on your bed extender. These can usually be found on the extended arms of the extender.
- Loosen the adjustment screws or levers using the appropriate tools. This will allow you to slide the arms in and out to the desired length.
- Measure the length of your truck bed to determine the exact position for the bed extender. This will ensure a proper fit without any gaps or overhang.
- Slide the arms of the bed extender to the desired length, as per your measurements. Make sure the arms are extended evenly on both sides of the truck bed.
- Tighten the adjustment screws or levers to secure the bed extender in place. Use a torque wrench or an appropriate tool to ensure that the extender is securely locked.
- Test the bed extender by gently applying pressure to make sure it is stable and secure. If there is any movement or wobbling, readjust the length and tighten the screws or levers further.
By following these steps, you can easily adjust your bed extender to fit various truck bed lengths, providing you with the flexibility and security you need when transporting cargo.
Ensuring a perfect fit for your truck bed
Having a perfect fit between your bed extender and the truck bed is essential to ensure the safety and stability of your cargo. Here are some additional tips to ensure a snug fit:
- Double-check your measurements before adjusting the bed extender. A slight miscalculation can lead to an ill-fitting extender and compromise the stability of your cargo.
- Make sure the bed extender is centered in the truck bed. It should be aligned with the sides and the tailgate for optimal balance and weight distribution.
- Inspect the bed extender regularly for any signs of wear and tear. Replace any damaged or worn-out parts to maintain the stability and functionality of your extender.
- Consider using additional securing mechanisms, such as tie-down straps or bungee cords, to secure your cargo to the bed extender. This will provide extra support and prevent any shifting during transportation.
By following these tips and taking the time to adjust your bed extender properly, you can ensure a perfect fit for your truck bed and enjoy a secure and hassle-free hauling experience.
Cleaning And Care Instructions
Proper cleaning and maintenance of your bed extender are important to ensure its longevity and optimal performance. By following these cleaning techniques and maintenance tips, you can keep your bed extender in top condition.
Proper cleaning techniques for the bed extender
To maintain the cleanliness and functionality of your bed extender, it is important to use the appropriate cleaning techniques. Follow these steps to properly clean your bed extender:
- Remove any debris: Before beginning the cleaning process, make sure to remove any dirt, dust, or other debris from the bed extender. You can use a brush or a cloth to gently sweep away loose particles.
- Use a mild cleaning solution: Mix a solution of mild soap or detergent with water. Wet a soft cloth or sponge with this solution and gently wipe down the bed extender. Avoid using abrasive cleansers or tools that may damage the surface.
- Rinse thoroughly: After cleaning, rinse the bed extender with clean water to remove any soap residue. Ensure that all soap has been washed away to prevent any buildup or potential damage.
- Dry completely: Allow the bed extender to dry fully before reattaching it to your vehicle. Excess moisture can lead to rust or other damage. Use a clean towel or air dry to ensure thorough drying.
Maintenance tips to extend its lifespan
Regular maintenance is essential to extend the lifespan of your bed extender. Follow these tips to keep it in excellent condition:
- Inspect for damage: Regularly inspect your bed extender for any signs of damage or wear. Check for loose screws, cracks, or bent components. If any issues are found, address them promptly to prevent further damage.
- Tighten screws and bolts: Over time, screws and bolts may loosen due to vibrations or usage. Periodically check and tighten all screws and bolts to ensure the bed extender remains securely attached to your vehicle.
- Apply lubrication: Lubricate any moving parts or hinges to maintain smooth operation. Use a suitable lubricant recommended by the manufacturer, applying it as per their instructions.
- Protect from harsh weather: Extreme weather conditions can cause damage to the bed extender. If possible, store it indoors when not in use to prevent exposure to excessive moisture, UV rays, or extreme temperatures.
By following these cleaning techniques and maintenance tips, you can keep your bed extender clean, functional, and extend its lifespan. Regular care and attention will help you get the most out of your investment, ensuring that it continues to perform efficiently whenever you need it.
Troubleshooting Common Issues
Identifying and resolving common problems
If you’re experiencing issues during the installation of a bed extender, don’t worry! In this section, we will explore some of the common problems that you may encounter and provide you with troubleshooting tips to help you resolve them quickly and effectively.
Troubleshooting tips for optimal performance
To ensure optimal performance of your bed extender, consider the following troubleshooting tips:
- Problem: The bed extender is not fitting securely on your truck bed.
- Solution: Double-check that you have chosen the correct bed extender model that is compatible with your truck make and model. Look for any obstructions that might be preventing the extender from fitting properly and make the necessary adjustments. Also, verify that all brackets and bolts are securely tightened.
- Problem: You are having difficulty extending or retracting the bed extender.
- Solution: Inspect the sliding mechanism for any dirt, debris, or rust that may be hindering its functionality. Apply a lubricant, such as silicone spray, to the sliding parts to ensure smooth movement. Furthermore, check the latch and locking mechanism to ensure they are engaging properly.
- Problem: The bed extender is rattling or making noise while driving.
- Solution: This issue can often be resolved by checking the tightness of the bolts and brackets that secure the bed extender to the truck bed. If any are loose, tighten them accordingly. You can also consider using rubber washers or foam padding on contact points to minimize vibrations and noise.
- Problem: The bed extender is not aligned or leveled with the truck bed.
- Solution: First, confirm that the brackets are correctly positioned and properly tightened. If the alignment issue persists, you may need to adjust the positions of the brackets or consult the manufacturer’s instructions for further guidance. Utilize a level to ensure that the bed extender is properly aligned both horizontally and vertically.
Remember, troubleshooting common issues with your bed extender is essential to maximize its functionality and ensure a smooth installation process. By following these troubleshooting tips, you can address common problems effectively and enjoy the benefits of your bed extender without any hassle.
Frequently Asked Questions On How To Install Bed Extender
How Does A Bed Extender Mount?
A bed extender mounts onto the truck bed using the existing tie-down points or brackets. It’s a simple process that involves attaching the extender securely to ensure stability and support.
Are Bed Extenders Worth It?
Yes, bed extenders are worth it as they provide extra space and support for larger items on the bed. They help prevent items from falling off the edge, making transportation safer and more secure. Bed extenders are a practical investment for those who frequently transport heavy or oversized objects.
How To Install Amp Bed Extender F150?
To install an AMP bed extender on an F150, follow these steps: 1. Start by assembling the extender according to the instructions manual. 2. Locate the attachment points on the bed of your F150. 3. Secure the extender to these attachment points using the provided hardware.
4. Make sure the extender is installed tightly and securely. 5. Test the extender to ensure it is functioning properly.
Are Truck Bed Extenders Good?
Truck bed extenders are beneficial for increasing hauling capacity. They provide extra space for longer cargo, making it easier to transport large items. With their sturdy construction, these extenders offer strength and durability. Overall, truck bed extenders are a good investment for anyone needing to transport oversized loads.
Conclusion
Installing a bed extender is a simple and worthwhile modification for your truck. By following these step-by-step instructions and using the right tools, you can easily enhance the hauling capacity of your vehicle. Whether you’re transporting large items or simply need more space, a bed extender is a practical addition.
Take the time to research the best bed extender for your specific truck model and start enjoying the convenience it offers.