To install a fuel pump on a Chevy 350, first, disconnect the negative battery cable and relieve the fuel pressure. Then, remove the fuel tank, disconnect the electrical connectors and fuel lines from the pump, and replace the old pump with a new one, securing it in place.
Finally, reconnect the electrical connectors and fuel lines, reinstall the fuel tank, and reconnect the negative battery cable. Welcome to our guide on how to install a fuel pump on a Chevy 350. Whether you are experiencing fuel delivery issues or simply need to replace an old pump, this step-by-step tutorial will help you complete the installation process with ease.
By following these instructions, you’ll be able to ensure smooth fuel flow and reliable performance for your Chevy 350 engine. So, let’s dive in and get started on this essential maintenance task.
Essential Tools And Materials Needed
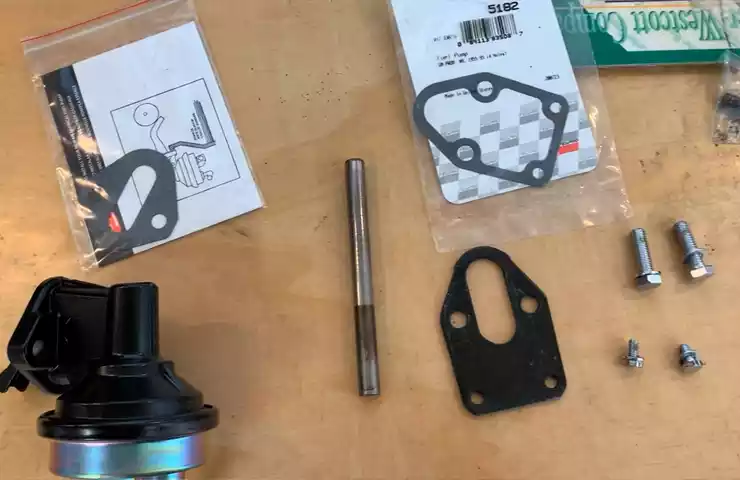
Fuel Pump Kit
One of the most essential tools you need for installing a fuel pump on a Chevy 350 is a fuel pump kit. This kit typically includes the fuel pump itself, along with any necessary gaskets, seals, and wiring harnesses. It is important to choose a high-quality fuel pump kit that is compatible with your Chevy 350 to ensure proper fit and performance.
Safety Goggles
When working with any type of automotive fuel system, safety should be your top priority. The installation process can involve the risk of fuel spills and splashes, which can be harmful if they come into contact with your eyes. To protect yourself, make sure to wear safety goggles throughout the installation process. Safety goggles will help shield your eyes from any potential hazards and ensure you can work comfortably and confidently.
Gloves
Handling fuel and various components of the fuel pump requires the use of gloves. They provide protection from any sharp edges or hot surfaces that may be encountered during the installation process. It is crucial to wear gloves to prevent injuries and maintain a safe working environment.
Work Gloves
Additionally, it is recommended to wear work gloves when handling tools and working under the vehicle. Work gloves provide not only protection for your hands but also enhance your grip on tools and prevent slipping. This allows you to have better control over the installation process, ensuring a secure and accurate fit for the fuel pump.
Mechanic’s Creeper
A mechanic’s creeper is a helpful tool that allows you to comfortably and easily slide under your Chevy 350 during the installation process. It provides support and mobility, enabling you to access hard-to-reach areas with ease. Using a mechanic’s creeper reduces strain on your body, providing a more efficient and enjoyable experience while installing the fuel pump.
Socket Set
A socket set is a must-have tool for any automotive repair or installation job, including fuel pump installation. It consists of various sizes of sockets, extensions, and a ratchet. This tool set allows you to easily loosen and tighten bolts and fasteners that secure the fuel pump and other components. Make sure to choose a socket set that includes the sizes required for your Chevy 350.
Wrench Set
In addition to a socket set, a wrench set is another essential tool for installing a fuel pump on a Chevy 350. Wrenches come in various sizes and types, including open-end wrenches and combination wrenches. They are used to loosen and tighten different types of bolts and fittings throughout the installation process. Having a complete set of wrenches ensures you have the necessary tools to complete the job efficiently and correctly.
Jack Stands
Working under a vehicle can be dangerous if it is not properly supported. Jack stands are used to securely raise and stabilize your Chevy 350 during the fuel pump installation process. It is important to choose jack stands with the appropriate weight capacity for your vehicle to ensure stability and avoid accidents. Always use jack stands in conjunction with a hydraulic jack or other lifting device to prevent the vehicle from slipping or falling.
Fuel Line Removal Tool
Removing the fuel pump requires disconnecting the fuel lines. A fuel line removal tool is specifically designed to safely and easily disconnect fuel lines without damaging them. This tool simplifies the process and minimizes the risk of leaks or other issues. Investing in a fuel line removal tool is highly recommended to ensure a smooth and successful fuel pump installation.
Gas Can and Funnel
Lastly, make sure to have a gas can and funnel on hand for the fuel pump installation on your Chevy 350. These items will be used to temporarily store and transfer any fuel that needs to be removed or drained during the process. A gas can and funnel allow for safe and controlled fuel handling, preventing spills and contamination.
Disconnecting The Battery And Draining The Fuel
Disconnecting the Negative Battery Terminal
To begin the process of installing a fuel pump on a Chevy 350, it’s important to disconnect the negative battery terminal. This ensures that there is no power flowing through the electrical system, reducing the risk of electric shocks.
Locating the Fuel Tank and Releasing Pressure
Next, you’ll need to locate the fuel tank. On most Chevy 350 models, it is located underneath the vehicle towards the rear. Once located, carefully release the pressure from the fuel system to prevent any fuel from spilling out.
To do this, you can follow these steps:
- Find the fuel pressure test port located on the fuel rail.
- Insert a small flathead screwdriver into the valve and carefully depress it.
- Be cautious as pressurized fuel might spray out, so it’s recommended to place a cloth or rag to catch any fuel that may be released.
Removing the Fuel Pump Fuse or Relay
Now that the pressure has been released from the fuel system, it’s time to remove the fuel pump fuse or relay. This step ensures that the fuel pump is not operational during the installation process, preventing any accidental fuel leakage.
Here’s how you can remove the fuel pump fuse or relay:
- Locate the fuse box, which is usually located under the hood or inside the cabin.
- Refer to the owner’s manual or the fuse box cover to identify the specific fuse or relay associated with the fuel pump.
- Using a fuse puller or a pair of needle-nose pliers, remove the fuel pump fuse or relay carefully.
Starting the Engine to Drain Remaining Fuel
To drain the remaining fuel from the system, start the engine. Running the engine will consume the fuel remaining in the lines and fuel rails, allowing for a safer installation process.
Follow these steps to start the engine:
- Ensure that the vehicle is in a well-ventilated area, as fumes can be toxic.
- Insert the key into the ignition and turn it to the “On” position without starting the engine.
- Allow the fuel pump to run for a few seconds before turning off the ignition.
It’s important to note that each vehicle may have slight variations in these steps. Therefore, referring to the specific vehicle’s owner’s manual is always recommended for accurate instructions.
Accessing The Fuel Tank And Pump
Installing a fuel pump on a Chevy 350 engine may seem like a daunting task, but with the right guidance, it can be a straightforward process. Before you begin the installation, you need to access the fuel tank and pump. This step is crucial to ensure proper installation and avoid any potential issues down the line. In this section, we will guide you through each step of accessing the fuel tank and pump on your Chevy 350.
Locating the Fuel Tank on the Chevy 350
The first step in accessing the fuel tank and pump is to locate the fuel tank on your Chevy 350. The fuel tank is typically located towards the rear of the vehicle underneath the trunk or bed. However, the exact location may vary depending on the model and year of your Chevy 350. Refer to your vehicle’s manual or conduct a quick online search to determine the precise location of your fuel tank.
Removing Obstacles to Gain Access
Once you have located the fuel tank, you may need to remove any obstacles that hinder access to it. This may involve removing the trunk liner, bed liner, or any other components that block your path. Carefully inspect the area surrounding the fuel tank and identify any bolts or fasteners that need to be loosened or removed. Taking the time to clear the path and create a clear working space will make the installation process much easier and efficient.
Ensuring Proper Support for the Fuel Tank
Before you begin working on the fuel pump, it is vital to ensure that the fuel tank is properly supported. The fuel tank can be heavy, especially when it’s filled with fuel, so it’s crucial to take the necessary safety precautions. We recommend using a hydraulic jack or jack stands to support the fuel tank securely. Before lifting the fuel tank, make sure to drain any remaining fuel to reduce the weight.
Once you have located the fuel tank, removed any obstacles, and ensured proper support, you are now ready to move on to the next steps of installing your fuel pump. This preparation stage is crucial to ensure a smooth and successful installation process. Stay tuned for the following sections where we will guide you step-by-step through the installation of your fuel pump on the Chevy 350.
Disconnecting Fuel Lines And Electrical Connections
Disconnecting fuel lines and electrical connections is a crucial step when installing a fuel pump on a Chevy 350 engine. To ensure a smooth process, it’s important to properly identify the fuel lines and connectors, use the appropriate tools for disconnecting the lines, and detach the electrical connections to the pump. Let’s dive into the details of each step:
Identifying the fuel lines and connectors
Before disconnecting any fuel lines, it’s essential to correctly identify them to avoid any confusion or potential damage. The Chevy 350 typically has two main fuel lines: the supply line that delivers fuel to the engine, and the return line that sends excess fuel back to the tank. These lines are usually made of rubber or metal and can be differentiated by their size and location.
Additionally, there are fuel connectors that attach the fuel lines to the fuel pump. These connectors often have a specific design, such as quick-connect fittings or threaded connections, depending on the model of the Chevy 350. Familiarizing yourself with the type of connectors used in your particular vehicle is essential for a successful disconnection process.
Using the appropriate tools to disconnect the lines
Once you have identified the fuel lines and connectors, using the right tools is crucial for a safe and efficient disconnection. Here are some commonly used tools:
- Fuel line disconnect tool: This tool is designed to safely disconnect quick-connect fuel lines without causing any damage. It slides between the connector and the fuel line, releasing the tabs or clips that secure them together.
- Fuel line wrench: In case the fuel lines are connected using threaded fittings, a fuel line wrench will come in handy. This specialized wrench allows you to grip and unscrew the fittings without causing any damage or leaking.
Ensure you have the correct size of tools for your specific fuel lines and connectors before attempting to disconnect them. This will prevent any potential damage that could result from using the wrong tools.
Detaching the electrical connections to the pump
Alongside the fuel lines, there are electrical connections that need to be detached from the fuel pump. These connections provide power to the pump and control its operation. Here’s how to properly detach them:
- Locate the electrical connections: Depending on the vehicle, the electrical connections can be found near the fuel pump or in the surrounding area. They are typically secured with clips or connectors.
- Disconnect the wiring harness: If the electrical connection is a wiring harness, gently press the release tabs and pull the harness apart. Be cautious not to damage any wires or connectors in the process.
- Remove any securing clips or connectors: Some electrical connections may be secured with clips or connectors. Use a small flat-head screwdriver or a designated tool to safely remove these securing mechanisms before disconnecting the wires.
- Disconnect the wires: Once the securing mechanisms are removed, carefully disconnect the wires from the fuel pump. It’s important to avoid excessive force or pulling on the wires to prevent any damage.
By following these steps, you can safely and effectively disconnect the fuel lines and electrical connections when installing a fuel pump on a Chevy 350. Remember to exercise caution and refer to your vehicle’s specific documentation if needed. Now that we have successfully disconnected the necessary components, we are ready to proceed with the installation of the new fuel pump.
Removing Retaining Ring And Old Fuel Pump
Removing the retaining ring and old fuel pump
One of the crucial steps in installing a fuel pump on a Chevy 350 is removing the retaining ring and the old fuel pump itself. This section will guide you through the process, ensuring a smooth and successful fuel pump replacement.
Loosening and removing the retaining ring
The retaining ring secures the fuel pump assembly in place, and loosening it is the first step to remove the old fuel pump. Follow these steps to effectively remove the retaining ring:
- Locate the fuel pump assembly, which is typically found on top of the fuel tank.
- Use a suitable wrench or pliers to grip the tabs of the retaining ring.
- Rotate the retaining ring counterclockwise to loosen it. Ensure a firm grip to prevent slipping.
- Continue rotating the retaining ring until it is completely free.
Properly removing the retaining ring will allow easy access to the old fuel pump assembly, facilitating its removal.
Removing the old fuel pump assembly
Now that the retaining ring is loosened and removed, it’s time to remove the old fuel pump assembly. Follow these steps carefully:
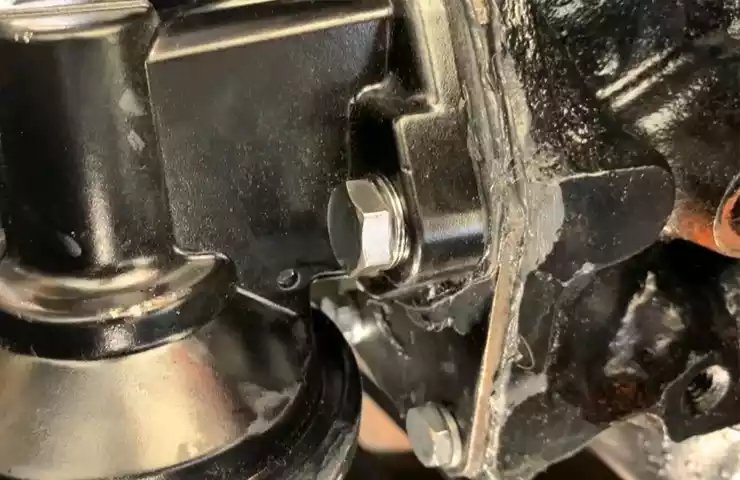
- Inspect the fuel pump assembly for any electrical or fuel connections, and disconnect them if present.
- Remove any mounting bolts or clips securing the old fuel pump assembly to the fuel tank. Take note of their location and keep them in a safe place for reassembly.
- Gently pull the old fuel pump assembly upwards to carefully detach it from the fuel tank.
- Once the old fuel pump assembly is removed, inspect it for any signs of damage or wear. Replace it with a new fuel pump assembly if necessary.
Removing the old fuel pump assembly may require some force, but be careful not to damage any surrounding components or the fuel tank itself. Taking these precautions will ensure a successful removal and pave the way for the installation of the new fuel pump.
Preparing The New Fuel Pump
Preparing the new fuel pump Inspecting the new fuel pump for any damage or defects Before installing a new fuel pump on your Chevy 350, it is crucial to inspect it thoroughly for any damage or defects. This step is essential to ensure that your new fuel pump functions optimally and prevents any potential issues down the road. To inspect the fuel pump, carefully examine it for physical damage, such as dents or cracks, that may impact its performance. Additionally, inspect the electrical connections and terminals to ensure they are intact and free from any corrosion or damage that could inhibit proper functioning. Transferring necessary components from old pump to new When installing a new fuel pump, it is common to transfer certain components from the old pump to the new one. This step helps to ensure that the new fuel pump is properly equipped and compatible with your Chevy 350’s fuel system. Begin by carefully removing the necessary components, such as the fuel filter or fittings, from the old pump. Inspect these components for any damage or wear and replace them if necessary. After removing the components, take note of their positions or take a photo for reference. Now, securely attach these components to the new fuel pump, ensuring they are properly aligned and fitted according to manufacturer specifications. Checking the seals and gaskets Before installing the new fuel pump, it is essential to check the seals and gaskets to prevent any potential fuel leaks. Inspect the seals and gaskets on both the old and new fuel pumps for any signs of wear, cracks, or deterioration. If you notice any damage, it is crucial to replace them before proceeding with the installation. Ensuring the integrity of the seals and gaskets is vital for maintaining a secure and leak-free fuel system. Carefully clean the sealing surfaces on both the fuel pump and the engine block to remove any debris or old gasket material. Once the surfaces are clean, place the new seals and gaskets in the correct positions before installing the fuel pump. By following these steps, you can prepare your new fuel pump for installation on a Chevy 350. Inspecting the new pump, transferring necessary components, and checking the seals and gaskets are crucial for ensuring a smooth and successful fuel pump installation process. Take the time to perform these tasks meticulously, and you’ll be one step closer to a properly functioning fuel system for your Chevy 350.
Installing The New Fuel Pump Assembly
Installing a new fuel pump assembly is an important step in maintaining the performance of your Chevy 350. A faulty fuel pump can cause poor engine performance, lack of power, and reduced fuel efficiency. In this section, I will guide you through the process of installing the new fuel pump assembly, ensuring a smooth and efficient installation.
Placing the new fuel pump into the fuel tank
Before you begin, make sure you have the necessary tools and safety equipment, such as gloves and safety goggles. To place the new fuel pump into the fuel tank, follow these steps:
- First, locate the fuel tank access panel, which is usually located under the rear of your Chevy 350. Remove any components that may obstruct your access to the fuel tank.
- Next, carefully disconnect the fuel lines from the old fuel pump assembly. Use a clean rag to catch any fuel that may spill during this process.
- Once the fuel lines are disconnected, remove the retaining ring that holds the old fuel pump in place. Take note of the orientation of the old fuel pump assembly.
- Now, take the new fuel pump assembly and position it properly inside the fuel tank. Make sure the orientation matches that of the old fuel pump assembly.
- Using mild force, press the new fuel pump assembly down until it sits snugly into its socket in the fuel tank.
Securing the retaining ring to hold the pump in place
After placing the new fuel pump assembly into the fuel tank, the next step is to secure the retaining ring. This will ensure that the fuel pump stays in place and functions properly. Follow these steps:
- Take the retaining ring and carefully position it over the new fuel pump assembly.
- Using a suitable tool, such as pliers or a wrench, tighten the retaining ring by turning it clockwise. Make sure it is securely fastened.
- Double-check the tightness of the retaining ring, ensuring there is no excessive play or movement of the fuel pump assembly.
Reconnecting the fuel lines and electrical connections
With the new fuel pump assembly securely in place, the final step is to reconnect the fuel lines and electrical connections. Follow these steps:
- Carefully reconnect the fuel lines to the new fuel pump assembly. Take note of the correct fittings and ensure a proper seal by checking for any fuel leaks.
- Slide the connectors in until they click into place, indicating a secure connection.
- Next, reconnect the electrical connections to the new fuel pump assembly. Ensure that the connections are properly seated and that there are no loose wires.
- Once all the connections are secure, take a moment to inspect the installation, checking for any loose or misplaced components.
Congratulations! You have successfully installed the new fuel pump assembly on your Chevy 350. By following these steps and ensuring a proper installation, you can enjoy improved engine performance and fuel efficiency.
Reconnecting The Battery And Testing
After successfully installing the fuel pump on your Chevy 350, it’s time to reconnect the battery and test your handy work. This step is crucial to ensure the proper functioning of your fuel pump and to identify any potential leaks. Follow these simple steps to complete the process:
<h3>Reconnecting the negative battery terminal</h3>
The first step is to reconnect the negative battery terminal. Locate the negative battery cable and carefully attach it to the negative terminal on the battery. Make sure it is tightly secured to prevent any disconnection during the testing process. This step is essential to restore power to the fuel pump and allow it to function efficiently.
<h3>Inserting the fuel pump fuse or relay back into place</h3>
Now, it’s time to insert the fuel pump fuse or relay back into its original position. This fuse or relay is responsible for providing power to the fuel pump. Refer to your vehicle’s manual to find the exact location of the fuse or relay. Carefully insert it back into place and ensure it is secure. This step is vital to enable the fuel pump to receive the necessary power to operate.
<h3>Starting the engine and checking for any leaks</h3>
Reinstalling Any Removed Obstacles
Now that we have successfully removed the fuel pump on our Chevy 350, it’s time to focus on the crucial next step – reinstalling any obstacles that were previously taken out. Ensuring the proper reinstallation of these components is essential for the optimal functioning of the fuel pump and the overall performance of the engine.
Ensuring all Obstacles are Properly Reinstalled
Before we proceed, it’s important to inspect all the obstacles that were removed during the fuel pump removal process. Take a closer look at components such as brackets, shields, and other elements that were temporarily set aside. Carefully examine them for any signs of damage, wear, or corrosion. If any issues are detected, it is essential to address them before reinstalling. This will help avoid any potential complications down the road.
Reattaching any Brackets or Shields
Once you have thoroughly inspected the removed obstacles and ensured their integrity, it’s time to reattach them. Begin by identifying the proper mounting positions for each component. Consult the vehicle’s manual or refer to any reference material you have on hand to locate the correct placement for brackets and shields.
Position the brackets or shields over their respective mounting points, aligning them accurately. Once aligned, secure them in place using the appropriate fasteners – be it screws, bolts, or clips. Ensure that each fastener is tightened securely but not overly tightened, as this can lead to damage or stress on the surrounding components.
If you encounter any difficulties during this process or find it hard to position the obstacles correctly, refer to the vehicle’s manual or seek guidance from a qualified mechanic.
Remember, taking the time to reinstall these obstacles properly is crucial for maintaining the fuel pump’s stability and the overall integrity of the engine system. By paying attention to this step, you can ensure the smooth operation of your Chevy 350 for miles to come.
Cleaning Up And Disposing Of Old Fuel Pump
Once you have successfully removed the old fuel pump from your Chevy 350, it is important to properly clean up any spilled fuel or debris and dispose of the old pump safely and responsibly. Here’s how you can tackle this step:
Disposing of the old fuel pump safely and responsibly
When it comes to disposing of the old fuel pump, you need to ensure that you follow proper guidelines to protect yourself and the environment. Here are some steps you can take:
- Check with your local regulations: Before disposing of the old fuel pump, it’s important to check with your local authorities or waste management facility for any specific disposal or recycling regulations in your area. Different regions may have different rules, so it’s essential to abide by them.
- Consider recycling options: Look for recycling programs that accept automotive parts, including fuel pumps. Many recycling centers or scrapyards may be able to take your old fuel pump and recycle it properly. Recycling helps reduce waste and environmental impact.
- Dispose of safely: If recycling is not an option, you can dispose of the old fuel pump safely. Make sure to drain any remaining fuel from the pump and place it securely in a puncture-resistant container. You can then contact your local waste management facility for guidance on how to dispose of it properly.
Cleaning up any spilled fuel or debris
While removing the old fuel pump, there may be instances when fuel spills or debris accumulate. It’s important to clean up these spills and debris to ensure a safe working environment. Here are some steps to follow:
- Take precautionary measures: First and foremost, make sure to wear proper protective gear, such as gloves and safety goggles, to protect yourself from any potential hazards. Safety should always be a priority.
- Containment and absorption: Immediately clean up any spilled fuel by using absorbent materials, such as oil absorbent pads or cat litter. These substances help contain the fuel and prevent it from spreading further. Dispose of the soaked absorbent material as per your local regulations.
- Clean the surrounding area: After containing the spilled fuel, clean the area thoroughly using a mild detergent and water. Avoid using harsh chemicals as they can be harmful to the environment. If necessary, use a brush or cloth to scrub away any stubborn stains or debris.
Once you have finished cleaning up the spills and disposing of the old fuel pump, you can now move on to the installation of the new fuel pump. Remember, taking care of your Chevy 350’s fuel system properly ensures its optimal functioning and longevity.
Post-Installation Checks And Maintenance
Once you have successfully installed a fuel pump on your Chevy 350, it is crucial to perform post-installation checks and regular maintenance to ensure the smooth operation and longevity of the pump. These checks and maintenance routines will help you verify proper fuel pump operation, identify any abnormalities or issues, and keep your Chevy 350 running in optimal condition.
Verifying proper fuel pump operation
To verify that your newly installed fuel pump is functioning properly, you can perform the following checks:
- Start the engine and listen for a buzzing or humming sound coming from the fuel pump. This indicates that the pump is actively working to deliver fuel to the engine.
- Observe the fuel pressure gauge, if available, to ensure it registers the correct pressure specified by the manufacturer. Any significant deviation from the recommended pressure could indicate a problem with the fuel pump.
- Check for any fuel leaks around the fuel pump and fuel lines. Leaks can lead to a loss of fuel pressure and should be addressed immediately.
Checking for any abnormal noises or issues
In addition to verifying proper fuel pump operation, it is essential to check for any abnormal noises or issues that may indicate problems with the fuel pump. Pay attention to the following:
- Listen for any unusual rattling, whining, or grinding noises coming from the fuel pump. These noises can be a sign of a failing pump or loose components that require attention.
- Monitor the engine performance closely. If you notice any hesitation, sputtering, or inconsistent acceleration, it could be a symptom of a fuel pump problem.
Regular maintenance and inspection recommendations
To ensure the longevity and optimal performance of your fuel pump, it is recommended to follow these regular maintenance and inspection routines:
- Replace the fuel filter at regular intervals as specified by the manufacturer. A clogged fuel filter can put additional strain on the fuel pump and impede fuel flow.
- Inspect the fuel lines for any signs of wear, leakage, or corrosion. Damaged or deteriorated fuel lines should be promptly replaced to prevent fuel leaks and pump failure.
- Clean the fuel injectors periodically to remove any buildup or deposits that can affect fuel delivery and engine performance.
- Consider using fuel additives designed to keep the fuel system clean and prevent deposits from forming inside the fuel pump and injectors.
Maintaining a healthy fuel pump is essential for the proper functioning of your Chevy 350. By performing post-installation checks, identifying any abnormal noises or issues, and following regular maintenance practices, you can ensure that your fuel pump operates optimally and delivers a consistent supply of fuel to your engine.
Frequently Asked Questions On How To Install A Fuel Pump On A Chevy 350
Can A Fuel Pump Be Installed Wrong?
Yes, a fuel pump can be installed incorrectly if not done carefully.
How To Install A Fuel Pump?
To install a fuel pump, first disconnect the negative battery cable. Locate the fuel tank and remove it, then disconnect the fuel lines and electrical connectors from the pump. Install the new fuel pump, reconnect the fuel lines and electrical connectors, and reinstall the fuel tank.
Finally, reconnect the negative battery cable.
How Long Does It Take To Change A Fuel Pump?
Changing a fuel pump typically takes around 2-4 hours. The process involves removing the old pump, installing the new one, and testing it for proper functionality. Expert technicians recommend seeking professional assistance for this task.
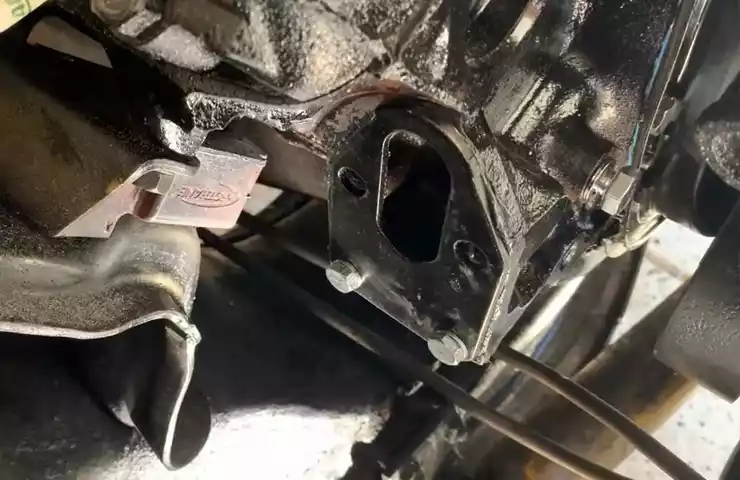
How Do You Remove A Mechanical Fuel Pump?
To remove a mechanical fuel pump, follow these steps: 1. Disconnect the negative battery terminal. 2. Disconnect fuel lines and vacuum hose from the pump. 3. Remove mounting bolts securing the pump to the engine. 4. Gently pry the pump off its mounting surface.
5. Clean the mounting surface before installing a new pump. For more detailed instructions, consult your vehicle’s service manual.
Conclusion
To summarize, installing a fuel pump on a Chevy 350 is a necessary process to keep the engine running smoothly and efficiently. By following the step-by-step instructions provided in this blog post, you can confidently complete this task on your own.
Remember to prioritize safety and consult your vehicle’s manual for any specific guidelines. With a properly installed fuel pump, you can enjoy a reliable and powerful performance from your Chevy 350 engine. Happy driving!