To install Bilstein 5100 shocks on an F150, follow these steps: (120 words) Upgrading your vehicle’s shocks can greatly improve its performance on and off-road. If you’re looking to install Bilstein 5100 shocks on your F150, you’re in the right place.
In this guide, we will walk you through the step-by-step process to install these shocks. Keep in mind that although we will cover the general installation process, it’s important to consult your vehicle’s specific manual for any model or year-specific instructions.
With the right tools and a little patience, you’ll have your F150 equipped with Bilstein 5100 shocks in no time. So, let’s get started with the installation process.
Preparation: Gathering The Necessary Tools And Parts
When it comes to improving the performance and ride quality of your Ford F150, upgrading the shocks is a great place to start. The Bilstein 5100 shocks are known for their durability and ability to handle rough terrains. In this guide, we will walk you through the process of installing these shocks on your F150. Before you get started, it’s essential to gather all the necessary tools and parts for a smooth installation. In this section, we will cover the tools needed for the installation as well as how to gather the required Bilstein 5100 shocks and additional parts.
Tools needed for the installation
To install the Bilstein 5100 shocks on your F150, you will need the following tools:
| Tool | Description |
|---|---|
| Socket wrench set | A set of socket wrenches in various sizes will be necessary to remove the old shocks and install the new ones. |
| Torque wrench | A torque wrench is essential for tightening the bolts to the recommended torque specifications. |
| Spring compressor | If your F150 is equipped with coil springs, a spring compressor will be needed to safely remove and install the shocks. |
| Jack and jack stands | You will need a jack and jack stands to elevate your F150 and secure it in place during the installation. |
| Pliers | A set of pliers will be handy for removing any clips or retaining rings. |
| Tape measure | A tape measure will be useful for measuring the height of your F150 before and after the shock installation. |
| Penetrating oil | Applying penetrating oil to stubborn bolts will help loosen them and make the removal process easier. |
| Threadlocker | Using threadlocker on the bolts will ensure they stay secure after installation. |
Make sure to have all these tools readily available before beginning the installation process to avoid any unnecessary delays. By having the right tools on hand, you’ll be well-prepared to take on the installation with confidence.
Gathering the required Bilstein 5100 shocks and additional parts
In addition to the tools, you will also need to gather the necessary Bilstein 5100 shocks and any additional parts required for the installation. Ensure that you have the correct shocks specifically designed for your F150 model and year. This can be done by checking the Bilstein website or consulting with a trusted automotive parts specialist.
If you plan on lifting your F150, you may also need to purchase additional parts such as leveling kits or lift blocks. These parts will help provide the desired lift height and maintain proper suspension geometry. It’s important to thoroughly research and choose the right parts for your specific requirements.
Once you have gathered all the necessary shocks and additional parts, you can move on to the next steps of the installation process. With your tools and parts ready, you’re now well-prepared to give your F150 the enhanced performance and ride quality it deserves with the installation of Bilstein 5100 shocks.
Removing The Old Shocks
Before installing your new Bilstein 5100 shocks on your F150, it’s crucial to remove the old shocks properly. This step is essential to ensure a smooth and successful installation process. In this section, we will walk you through the steps needed to remove the old shocks from your vehicle.
Preparing the vehicle for the installation process
Before you begin removing the old shocks, it’s important to prepare your vehicle to ensure a safe working environment. Here are a few steps you can follow to get started:
- Find a flat and stable surface to park your vehicle on. Avoid working on uneven or sloped surfaces as this can pose safety risks.
- Engage the parking brake to prevent the vehicle from rolling while you work on it.
- If your F150 has a lift kit or larger tires, it’s recommended to use a jack and securely support the vehicle on jack stands. This will provide additional stability during the removal process.
- Gather the necessary tools for the job, including a socket wrench, appropriate socket sizes, a torque wrench, and any other equipment mentioned in the shock installation instructions.
- Take a moment to familiarize yourself with the manufacturer’s instructions that came with your Bilstein 5100 shocks. This will ensure you are aware of any specific requirements or considerations for your particular vehicle model.
Removing the old shocks
Now that you have prepared the vehicle for the installation process, it’s time to remove the old shocks from your F150. Follow these steps to complete this task:
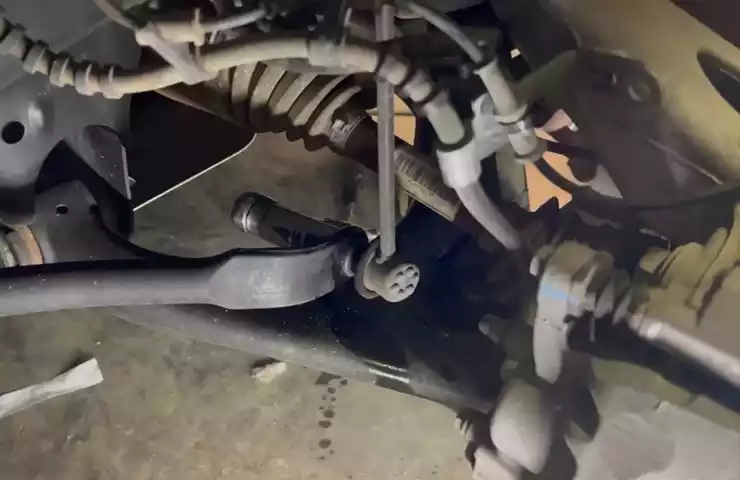
- Locate the old shocks on your vehicle. They are typically found near the wheels and are connected to the suspension components.
- Using a socket wrench, remove the upper and lower mounting bolts that secure the shocks in place. These bolts may be tight, so it’s advisable to use a breaker bar for extra leverage if needed.
- Once the mounting bolts are removed, carefully detach the old shocks from the suspension components while ensuring no surrounding parts or wires are damaged in the process.
- Take note of the old shocks’ orientation and placement as this will help you correctly install the new Bilstein 5100 shocks later.
- Inspect the removed shocks for any signs of damage or wear. If you notice any issues, it may be necessary to replace additional suspension components as well.
- Repeat these steps for all four corners of your F150, removing one old shock at a time until they are all disconnected from the suspension.
By following these steps, you have now successfully removed the old shocks from your F150, setting the stage for the installation of your new Bilstein 5100 shocks. Now, let’s move on to the next section, where we will guide you through the process of installing the new shocks on your vehicle.
Installing The Bilstein 5100 Shocks
Upgrading the shock absorbers on your F150 is an essential step towards improving your vehicle’s suspension performance. The Bilstein 5100 Shocks are known for their durability, excellent damping capabilities, and ability to enhance overall ride comfort. In this guide, we will walk you through the step-by-step process of installing these high-quality shocks on your F150. Let’s get started!

Step 1: Positioning the new shock absorber
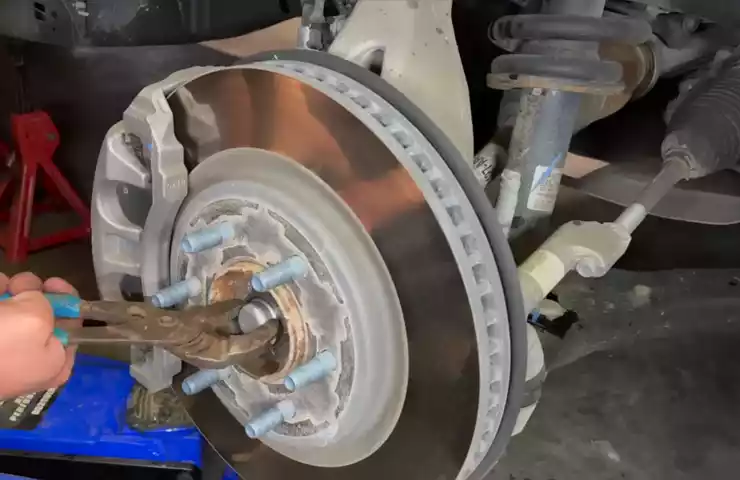
Before you begin, make sure you have all the necessary tools handy, including a socket wrench, torque wrench, and jack stands. Start by locating the old shock absorber that you wish to replace. Use a jack to lift your F150 off the ground and place jack stands securely under the frame for added safety.
Next, locate the upper mounting bolt of the old shock absorber. Using the socket wrench, carefully remove the bolt and set it aside. Once the upper bolt is removed, you can carefully detach the old shock absorber from its lower mounting bracket. Take note of the positioning and orientation of the old shock absorber as it will help you when installing the new Bilstein 5100 Shock.
Step 2: Attaching the upper mounting bolts
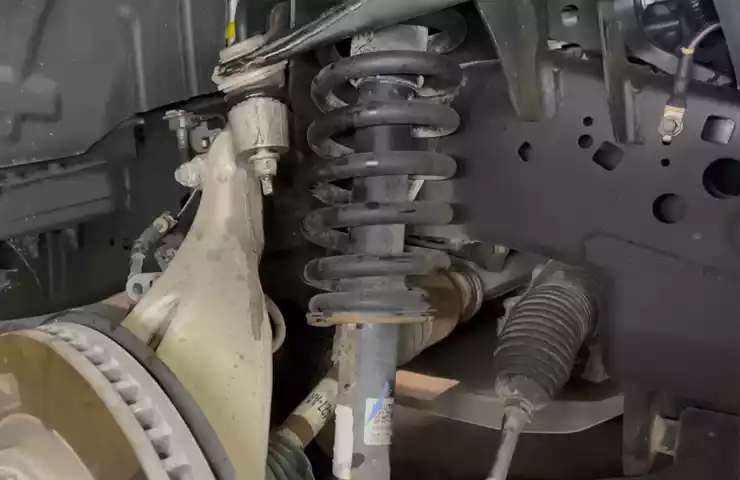
Now, it’s time to install the new Bilstein 5100 Shock. Start by positioning the shock absorber in the same orientation as the old one. Align the upper mounting hole of the shock absorber with the corresponding hole on your F150’s frame. Gradually insert the upper mounting bolt through the holes, ensuring a secure fit. Make sure to tighten the bolt using the torque wrench to the recommended torque specified by the manufacturer.
Step 3: Installing the lower mounting bolts
Once you have successfully attached the upper mounting bolt, it’s time to move on to the lower mounting bolts. Align the lower end of the shock absorber with the lower mounting bracket on your F150. Insert the lower mounting bolts through the holes on both the shock absorber and the bracket. As before, tighten the bolts to the recommended torque using the torque wrench, ensuring a snug fit.
Step 4: Tightening the bolts to the recommended torque
With all the bolts attached, it’s crucial to double-check that all connections are secure. Use the torque wrench to tighten the bolts, following the manufacturer’s recommended torque specifications. Take your time to ensure that each bolt is properly tightened, as these shocks play a critical role in your suspension system’s performance and overall ride comfort. Once all bolts are tightly fastened, carefully lower your F150 off the jack stands.
Congratulations! You have successfully installed the Bilstein 5100 Shocks on your F150. Enjoy the enhanced ride quality and improved handling characteristics!
Adjusting The Bilstein 5100 Shocks
When it comes to improving the performance and ride quality of your F150, installing Bilstein 5100 shocks is always a great choice. These high-performance shocks are designed to provide excellent damping and control, enhancing your vehicle’s handling and comfort on various terrains. One of the standout features of the Bilstein 5100 shocks is their adjustable settings, allowing you to fine-tune your F150’s ride height to achieve the desired level of performance and aesthetics. In this section, we will walk you through the process of adjusting the Bilstein 5100 shocks on your F150, ensuring you can optimize your driving experience.
Understanding the adjustable feature of the Bilstein 5100 shocks
The adjustable feature of the Bilstein 5100 shocks allows you to set your preferred ride height by selecting one of the available adjustment settings. These settings offer different lift heights, which can range from stock height to a maximum of several inches (depending on the specific shock model and application). By adjusting the shocks, you can not only level out your F150’s stance but also accommodate larger tires, improving ground clearance and off-road capabilities. Before diving into the adjustment process, it is crucial to determine your desired ride height.
Step 1: Determining the desired ride height
To determine the desired ride height, consider factors such as your driving preferences and requirements. Are you looking for a leveled stance or a more aggressive appearance? Do you plan on driving primarily on the road or venture off-road frequently? Take these factors into account to ensure you select the right setting for your needs. It is important to note that adjusting the ride height may require additional modifications, such as installing aftermarket control arms or longer sway bar end links, depending on the lift you choose.
Step 2: Adjusting the shocks to the desired setting
Once you have determined your desired ride height, it’s time to adjust the Bilstein 5100 shocks accordingly. The adjustment process may vary slightly depending on your F150 model and the specific shock installation, so always refer to the manufacturer’s instructions for detailed guidance. Generally, the adjustment is made by relocating the snap ring on the shock body to one of the predetermined grooves. This alters the extended length of the shock, thus changing the ride height. Ensure that you adjust all four shocks evenly to maintain balanced performance and stability.
It is important to note that when adjusting the shocks, you may need to compress or expand them using a suitable tool, such as a coil spring compressor or a spanner wrench. Always follow proper safety precautions and use the appropriate tools to prevent any accidents or damage to the shocks.
In conclusion, adjusting the Bilstein 5100 shocks on your F150 can significantly improve your driving experience by allowing you to fine-tune your vehicle’s ride height. By understanding the adjustable feature, determining your desired ride height, and following the appropriate adjustment process, you can achieve optimal performance and aesthetics for your F150. Don’t hesitate to invest the time and effort into adjusting your Bilstein 5100 shocks – your F150 will thank you with improved handling, comfort, and style.
Testing And Finalizing The Installation
After carefully installing the Bilstein 5100 Shocks on your F150, it’s time to test and finalize the installation. Conducting a test drive to evaluate the performance and ensuring that the shocks are properly installed and functioning correctly are essential steps to make sure your vehicle is optimized for both comfort and control.
Conducting a test drive to evaluate the performance
Now that the Bilstein 5100 Shocks are installed on your F150, it’s time to hit the road and put them to the test. Take your vehicle for a test drive on different types of terrain – highways, city streets, off-road trails, and any other road surfaces you typically encounter. Pay close attention to how your F150 handles and feels during the test drive.
During the test drive, be on the lookout for any improvement in ride quality and stability. The Bilstein 5100 Shocks are known for their superior performance and ability to absorb impacts, so you should notice a significant reduction in body roll, improved handling around corners, and minimized vibrations. Take mental notes of any changes you observe compared to the previous shocks you had installed.
Additionally, test the shocks’ responsiveness by performing sudden stops, accelerating quickly, and maneuvering tight turns. See if the F150 feels more composed and controlled in these situations, which are typically challenging for the suspension system. If you notice a significant improvement, it’s a good indication that the Bilstein 5100 Shocks are doing their job effectively.
Ensuring the shocks are properly installed and functioning correctly
After the test drive, it’s important to ensure that the Bilstein 5100 Shocks are properly installed and functioning correctly. Start by visually inspecting the shocks to make sure there are no leaks, loose connections, or any signs of damage. If you notice any issues, it’s crucial to address them promptly to avoid potential problems down the line.
Next, perform a bounce test on each corner of your F150. Push down forcefully on the front or rear bumper and release. The vehicle should bounce back up and settle into its regular position without excessive bouncing or bouncing unevenly. This test helps confirm that the shocks are properly installed and functioning correctly.
To further verify their functionality, pay attention to how the vehicle handles various driving conditions in the days and weeks following the installation. If you experience any unusual noises, vibrations, or an unexpected change in the vehicle’s behavior, it’s advised to have a professional mechanic inspect the shocks to ensure they are functioning as intended.
In conclusion, testing and finalizing the installation of Bilstein 5100 Shocks on your F150 is vital for assessing their performance and verifying proper functionality. Through a thorough test drive, evaluating ride quality, stability, and responsiveness, you can determine the shocks’ effectiveness in enhancing your F150’s performance. Additionally, conducting visual inspections and bounce tests is essential to confirm that the shocks are installed correctly and operating as they should. By following these steps, you can have peace of mind knowing that your F150 is equipped with top-of-the-line shocks that will provide a smoother and more controlled driving experience in various conditions.
Additional Tips And Considerations
Installing Bilstein 5100 shocks on your F150 can greatly enhance your off-roading experience and improve your overall ride comfort. However, to ensure optimal performance and longevity of your shocks, there are a few additional tips and considerations to keep in mind. In this section, we will explore common troubleshooting issues that may arise, discuss proper maintenance practices, and provide insights into warranty and support options for your Bilstein 5100 shocks.
Exploring Common Troubleshooting Issues
While Bilstein 5100 shocks are known for their durability and reliability, it’s not uncommon for some troubleshooting issues to arise during the installation process. Below are a few common issues and tips to help you resolve them:
- Improper Fitment: If you encounter difficulties during the installation where the shocks do not seem to fit properly, double-check that you have the correct shocks for your F150 model and year. Refer to the Bilstein 5100 shocks compatibility chart or reach out to their customer support for assistance.
- Noise or Squeaking: If you notice noise or squeaking after the installation, ensure all bolts and hardware are tightened to the manufacturer’s specifications. Lubricating the bushings and pivot points with a silicone-based lubricant can also help reduce friction and eliminate noise.
- Excessive Bouncing or Bottoming Out: If your F150 experiences excessive bouncing or bottoming out after the Bilstein 5100 shocks installation, it may indicate that the shocks need further adjustment. Consider adjusting the ride height setting or consult a professional to ensure the shocks are properly calibrated for your specific vehicle and desired ride comfort level.
Proper Maintenance of the Bilstein 5100 Shocks
Just like any other component in your vehicle, proper maintenance of the Bilstein 5100 shocks is essential to ensure optimal performance and longevity. Here are a few maintenance tips to keep in mind:
- Regular Inspections: Periodically inspect the shocks for any signs of leakage, damage, or excessive wear. If you notice any issues, it’s important to address them promptly to prevent further damage or compromised performance.
- Cleaning: Keep the shocks clean and free from dirt, debris, and corrosive elements. Simply wiping them down with a damp cloth and mild soap can help prolong their lifespan.
- Replacing Worn Components: Over time, components such as bushings and seals may wear out. It’s important to replace these worn parts as soon as you notice signs of deterioration to maintain the performance and integrity of your Bilstein 5100 shocks.
Understanding the Warranty and Support Options
Bilstein stands behind the quality of their products and provides warranties to ensure customer satisfaction. When purchasing Bilstein 5100 shocks, it’s crucial to understand the terms of the warranty and available support options. Here are some key points to consider:
| Warranty Coverage: | The Bilstein 5100 shocks typically come with a limited lifetime warranty that covers defects in materials and workmanship. However, it’s important to read the warranty terms and conditions to understand what is specifically covered. |
|---|---|
| Support Options: | Bilstein offers customer support through various channels, including phone, email, and online chat. If you encounter any issues or have questions about your Bilstein 5100 shocks, don’t hesitate to reach out to their knowledgeable support team for guidance. |
By following these additional tips and considerations, you can ensure a successful installation of Bilstein 5100 shocks on your F150. Remember, proper troubleshooting, maintenance, and understanding warranty and support options are vital to maximize the performance and lifespan of your shocks, allowing you to conquer new off-road adventures with confidence.
Frequently Asked Questions On How To Install Bilstein 5100 Shocks On F150
Should Bilstein 5100 Be Installed Boot Up Or Down?
Install Bilstein 5100 shock absorbers with the boot facing down.
Are Bilstein 5100 Shocks Better Than Stock?
Yes, Bilstein 5100 shocks are better than stock because they offer improved handling, stability, and durability. They enhance the overall performance and provide a smoother ride on various terrains. Upgrade your stock shocks to Bilstein 5100 for a better driving experience.
How Much Lift Do You Get From Bilstein 5100?
The amount of lift you can achieve with Bilstein 5100 shocks varies depending on your vehicle’s make and model. It is best to check with the manufacturer or a trusted mechanic to determine the specific lift you can expect.
Does Bilstein 5100 Help With Towing?
Yes, the Bilstein 5100 helps with towing. It provides excellent stability and control, enhancing your vehicle’s towing capabilities. Its advanced design and high-performance features make it an ideal choice for towing heavy loads.
Conclusion
In a nutshell, installing Bilstein 5100 Shocks on your F150 is a game-changer for your truck’s performance and comfort. By providing unparalleled control, stability, and durability, these shocks elevate your driving experience to a whole new level. The straightforward installation process, as outlined in this guide, means you can easily upgrade your suspension system and enjoy the benefits in no time.