To install a bumper cover, begin by removing any fasteners securing the old cover. Then, align the new cover and secure it in place with the appropriate fasteners.
When it comes to installing a bumper cover, the process can be relatively straightforward if you follow a few key steps. First, you’ll want to remove any fasteners that are holding the old bumper cover in place. Carefully detach these to ensure a smooth removal.
Next, align the new bumper cover in the correct position, making sure it lines up with the rest of the vehicle body. Finally, use the appropriate fasteners to securely attach the new cover, ensuring a tight fit and overall aesthetic appeal. With the right tools and attention to detail, you’ll have your bumper cover installed and looking brand new in no time.
Tools And Materials
Before you begin the process of installing a bumper cover, it is important to gather all the necessary tools and materials. This will ensure that you have everything you need to successfully complete the installation without any hiccups.
Necessary tools:
- Socket set: An assortment of sockets of different sizes will be required to remove the bolts holding the old bumper cover in place.
- Ratchet: A ratchet is necessary for loosening and tightening the bolts.
- Screwdriver: Both flathead and Phillips head screwdrivers may be needed, depending on the type of screws or fasteners on your bumper cover.
- Pry tool: A pry tool will come in handy for gently removing any clips or retainers that hold the bumper cover in place.
- Towel or blanket: Using a towel or blanket to protect the bumper from scratches or damage during the installation process is always a good idea.
- Torque wrench: A torque wrench will help you ensure that the bolts are tightened to the manufacturer’s specifications, preventing any issues with loose or overtightened bolts.
Required materials:
- Bumper cover: Ensure that you have purchased the correct bumper cover for your specific make and model of vehicle.
- Bumper brackets: In some cases, you may need to replace or repair the bumper brackets, so it is a good idea to have new ones on hand just in case.
- Clips and retainers: Depending on your vehicle, you may need to replace some clips or retainers that hold the bumper cover in place. It is always a good idea to have extras available.
- Primer and paint: If your new bumper cover does not come pre-painted, you will need to purchase primer and paint that matches your vehicle’s color.
- Cleaning supplies: Before installing the new bumper cover, make sure to clean the area thoroughly with soap and water or a mild cleaning solution to remove any dirt or debris.
By ensuring that you have all the necessary tools and materials, you can be confident that the installation process will go smoothly. Take your time and follow the instructions carefully, and soon enough, your vehicle will have a brand new bumper cover that will enhance its appearance and protection.
Preparation
Park the vehicle in a safe and well-lit area
Parking the vehicle in a safe and well-lit area is the first step in preparing to install a bumper cover. Choosing a suitable location ensures that you have enough space to work comfortably, reducing the risk of damage to the vehicle or yourself. It is recommended to park the vehicle on a level surface to prevent any rolling or movement while working. Taking this precautionary measure creates a stable environment, allowing you to focus on the task at hand. Additionally, a well-lit area is essential for visibility, enabling you to accurately assess the condition of the bumper cover and align it properly during installation.
Gather all the necessary tools and materials
Before starting the installation process, make sure you have gathered all the necessary tools and materials. Having these items ready will not only save you time, but also ensure a smooth and efficient installation. Below is a list of tools and materials you will need:
| Tools | Materials |
|---|---|
| Socket setRatchetTrim panel removal toolFlathead screwdriverTorx bit set | Bumper coverBumper cover fastenersClip retainersReplacement emblems or trim pieces (if needed)Parking lights (if needed) |
Once you have gathered all the necessary tools and materials, you are ready to move on to the next step of the installation process. Making sure you have everything in one place helps avoid interruptions and ensures a more productive and efficient installation.
Removing The Old Bumper Cover
If you find yourself needing to install a new bumper cover on your vehicle, the first step is to remove the old one. This process involves locating and removing the screws or clips that secure the bumper cover, inspecting for any additional fasteners, and finally detaching the old bumper cover from the vehicle. Let’s go through each step in detail.
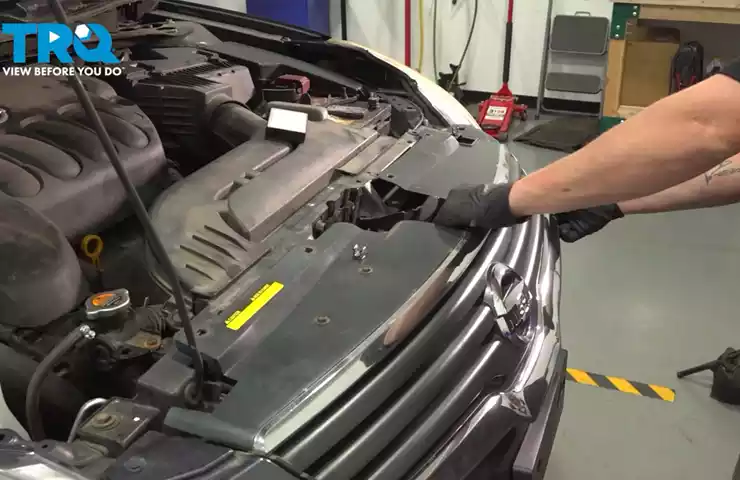
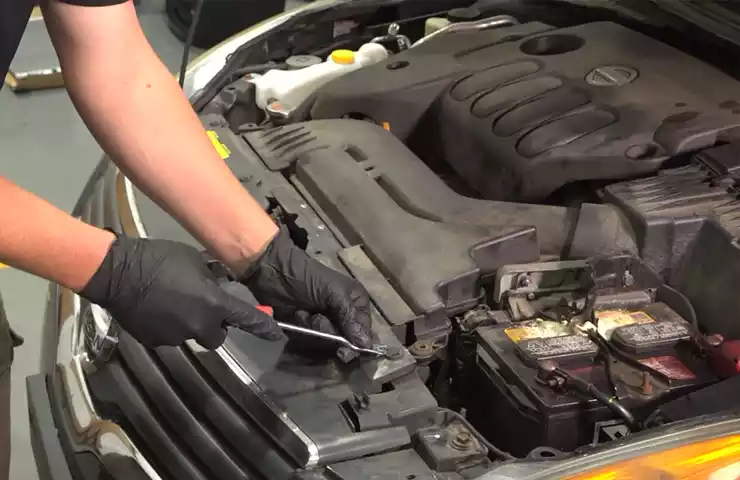
Locate and remove the screws or clips securing the bumper cover
To begin, you will need to locate the screws or clips that are holding the old bumper cover in place. These may vary depending on the make and model of your vehicle. Typically, you can find them around the edges of the bumper cover or underneath it. Using the appropriate tool, such as a screwdriver or a trim panel removal tool, carefully remove these screws or unclip the clips. Take your time to avoid any damage to the bumper cover or the surrounding area. If using screws, it is a good practice to keep them in a safe place for reuse when installing the new bumper cover. This will ensure a secure fitment and will save you from having to search for replacement screws later on.
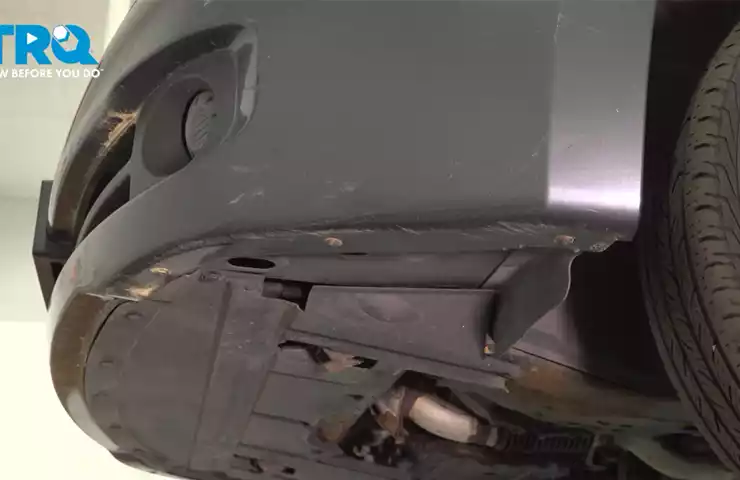
Inspect for any additional fasteners and remove them
After removing the visible screws or clips, it is important to inspect the bumper cover for any additional fasteners. These may be hidden or not immediately noticeable, so a thorough inspection is necessary. Check under the wheel arches, inside the trunk or hood, or beneath the vehicle to see if there are any hidden fasteners. These could be in the form of bolts, nuts, or additional clips. Use your tool to carefully remove them, keeping in mind their location for ease of reinstalling the new bumper cover later.
Carefully detach the old bumper cover from the vehicle
Once you have removed all the screws, clips, and additional fasteners, it is time to detach the old bumper cover from the vehicle. Start by gently pulling the cover away from the vehicle, starting at one corner and working your way across. Take caution not to force or yank the bumper cover, as this could cause damage to the vehicle or the cover itself. If you encounter any resistance, double-check for any remaining fasteners that may still be attached. Once you have successfully detached the old bumper cover, set it aside in a safe location to prevent it from getting damaged or causing any accidents.
In conclusion
Removing the old bumper cover is the first step in installing a new one. By following these steps carefully and taking the time to locate and remove all the screws, clips, and additional fasteners, you can ensure a smooth transition from the old to the new. Remember to keep any reusable screws or fasteners in a safe place for the installation of the new bumper cover. With a bit of patience and attention to detail, you’ll be well on your way to replacing your bumper cover in no time.
Preparing The New Bumper Cover
When it comes to installing a new bumper cover, there are several important steps that need to be taken to ensure a successful and seamless installation. One of the first and most crucial steps in the process is preparing the new bumper cover. This involves examining the bumper cover for any damage or defects, making sure it is the correct fit for your vehicle, and cleaning it thoroughly for a smooth installation.
Examine the new bumper cover for any damage or defects
Before proceeding with the installation, take the time to carefully examine the new bumper cover for any signs of damage or defects. Look out for cracks, dents, scratches, or any other imperfections that may affect the appearance or functionality of the bumper cover. If you notice any issues, it’s important to address them with the supplier or retailer before proceeding further. Inspecting the bumper cover ensures that you are starting off with a high-quality product that will enhance the overall look of your vehicle.
Make sure the new bumper cover is the correct fit for your vehicle
Next, it’s important to confirm that the new bumper cover is the correct fit for your specific vehicle model. Bumper covers are designed to match the curves and dimensions of different vehicles, so it’s crucial to choose one that is specifically designed for your make and model. Check the product description, packaging, or consult with a professional to ensure that you have selected the right bumper cover that will seamlessly integrate with your vehicle’s exterior.
Clean the new bumper cover to ensure a smooth installation
Once you have confirmed the new bumper cover is in good condition and the correct fit, it’s time to clean it thoroughly. A clean surface is essential for proper installation and ensures that the adhesive or clips will adhere firmly to the bumper cover. Start by removing any protective film or coverings from the bumper cover and use a gentle detergent to wash away any dirt, dust, or debris. Rinse it off with clean water and allow it to dry completely before proceeding with the installation process. By taking the time to clean the bumper cover, you are setting the stage for a smooth and successful installation.
Installing The New Bumper Cover
Installing a new bumper cover can greatly enhance the appearance of your vehicle while providing added protection. Whether you’re replacing a damaged bumper cover or simply upgrading to a new style, it’s important to follow the proper installation process to ensure a secure fit. In this guide, we will walk you through the step-by-step process of installing a new bumper cover, from aligning it with the vehicle to securing all the necessary fasteners.
Align the new bumper cover with the vehicle
Before attaching the new bumper cover, it’s crucial to align it properly with the vehicle’s body. This will ensure a seamless fit and a professional-looking finish. Begin by visually inspecting the bumper cover, making sure that all the edges and corners match the body lines of your vehicle. Adjust as necessary until you achieve the desired alignment.
Attach the bumper cover using the screws or clips removed earlier
Once you have aligned the new bumper cover, it’s time to secure it to the vehicle. If you removed any screws or clips from the old bumper cover during the removal process, locate them and use them to attach the new bumper cover. Carefully fasten each screw or clip, making sure they are tightened sufficiently to hold the bumper cover in place but not overtightened to avoid damaging the cover or the vehicle.
Secure any additional fasteners required for the new bumper cover
Depending on the make and model of your vehicle, there may be additional fasteners required to secure the new bumper cover. These may include bolts, nuts, or clips that were not present on the old bumper cover. Consult the installation manual or the manufacturer’s instructions to identify any additional fasteners needed. Carefully install these fasteners, ensuring they are properly tightened to ensure a secure fit.
Double-check the alignment and fit of the bumper cover
Once you have attached the new bumper cover and secured all the necessary fasteners, it’s important to double-check its alignment and fit. Step back and visually inspect the bumper cover from various angles to ensure it is flush with the vehicle’s body. Gently push and pull on different areas of the bumper cover to check for any loose or wobbly sections. Making any necessary adjustments at this stage will help ensure a perfect fit and a professional finish.
With these steps completed, you have successfully installed your new bumper cover. Take a moment to admire your work and enjoy the refreshed and upgraded appearance of your vehicle. Now you can hit the road with confidence, knowing that your new bumper cover is securely in place and ready to provide both style and protection.
Finalizing The Installation
Test the functionality of any sensors or lights on the bumper cover
After successfully installing the new bumper cover, it is important to ensure that all the sensors and lights are functioning properly. These components play a crucial role in alerting you to any potential dangers on the road and enhancing visibility. To test the functionality, first, turn on your vehicle’s engine and activate the headlights. Inspect the lights on the bumper cover, making sure they are bright and illuminate as expected. Additionally, if your bumper cover has any sensors such as parking sensors or collision sensors, you need to test them as well. Activate these sensors and verify that they respond appropriately to different obstacles around your vehicle. This step will give you peace of mind knowing that your bumper cover is fully operational.
Make any necessary adjustments to ensure a proper fit
During the installation process, it’s possible that some adjustments may be required to achieve a perfect fit for your new bumper cover. Start by visually inspecting the cover, checking for any misalignment or gaps between the cover and the vehicle. If there are any noticeable discrepancies, you may need to adjust the positioning of the bumper cover. This can typically be done by loosening the mounting bolts or clips and carefully repositioning the cover. Once you have made the necessary adjustments, tightly secure the bolts or clips back into place. Take your time to ensure that the bumper cover aligns seamlessly with the rest of the vehicle’s body, as this will not only enhance the aesthetics but also provide proper protection.
Clean the bumper cover and vehicle to give it a polished look
Now that your new bumper cover is installed and properly aligned, it’s time to give it a polished look by cleaning both the bumper cover and the rest of the vehicle. Start by using a mild soap or car wash solution and water to gently cleanse the surface of the bumper cover. Avoid using abrasive materials or harsh chemicals that could potentially damage the cover. After thoroughly cleaning the bumper cover, rinse it off with clean water and pat it dry using a microfiber cloth to prevent any water spots. Additionally, make sure to clean the surrounding area of the vehicle, including adjacent body panels, grille, and headlights. This will ensure a uniform appearance and make your newly installed bumper cover blend seamlessly with the rest of the vehicle. Finally, stand back and admire your handiwork as your vehicle now sports a fresh, clean, and polished bumper cover that’s ready to hit the road. In conclusion, the final steps of installing a bumper cover involve testing the functionality of any sensors or lights, making necessary adjustments for a proper fit, and giving the bumper cover and vehicle a polished look through careful cleaning. Following these steps will not only ensure that your bumper cover is in optimal condition but also result in a visually appealing and professionally installed appearance. Remember to take your time and attention to detail as you finalize the installation process, as it is crucial in ensuring the longevity and performance of your new bumper cover.
Frequently Asked Questions For How To Install A Bumper Cover
How Do You Reattach A Bumper Cover?
To reattach a bumper cover, follow these steps: 1. Remove any fasteners or screws holding the damaged cover in place. 2. Align the cover with the bumper and make sure it fits properly. 3. Apply adhesive or clips to secure the cover back onto the bumper.
4. Press firmly to ensure a secure attachment. 5. Allow the adhesive to dry completely before driving. Remember to wear gloves and use caution during the process.
Is Replacing A Bumper Cover Hard?
Replacing a bumper cover can be challenging, but not necessarily difficult. It requires proper tools and knowledge of the car’s model. Careful attention must be paid to removing and installing the cover properly to ensure a seamless fit. However, with proper guidance, it can be done efficiently.
Can I Install A New Bumper Myself?
Yes, you can install a new bumper yourself. Just ensure you have the necessary tools and follow a step-by-step guide. Take precautions to avoid any damage or injury. If you prefer, you can also hire a professional for assistance.
Does A Bumper Cover Go Over The Bumper?
Yes, a bumper cover is designed to go over the bumper. It serves as a protective layer and enhances the appearance of the bumper. It is easy to install and can be customized to match the vehicle’s paint color and style.
Conclusion
Learning how to install a bumper cover can be a simple and rewarding DIY project for car enthusiasts. By following the step-by-step guide provided in this blog post, you can effectively protect your vehicle’s front or rear bumper from damage while enhancing its overall appearance.
Remember to gather the necessary tools and take your time during the installation process to ensure a seamless fit. Installing a bumper cover not only adds a layer of protection but also gives your vehicle a fresh and polished look.